
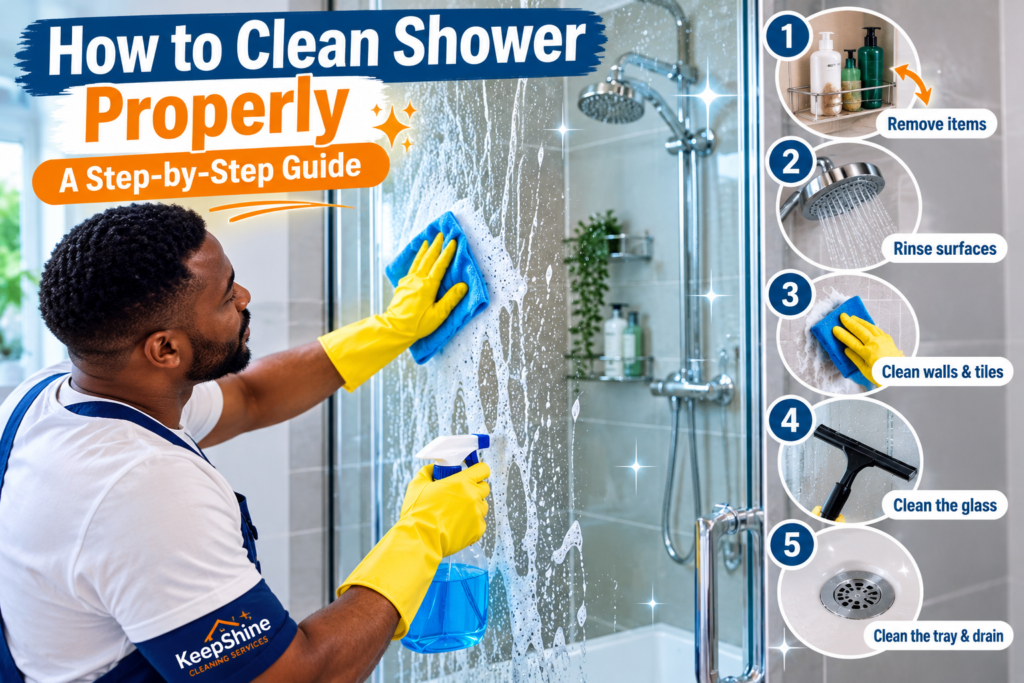
Shower cleaning is easier when you tackle soap scum, limescale, glass and grout in the right order. This guide explains how to clean your shower properly, safely and efficiently.
A shower can look clean at first glance while still holding a layer of soap residue, body oils, limescale and moisture around the glass, fittings, tiles and grout. Left alone, these deposits become harder to remove and can make the whole bathroom feel less fresh.
The good news is that you do not need an endless collection of cleaning products. A consistent method, the right tools and a little attention to problem areas can make shower cleaning much more manageable.
What Is the Best Way to Clean a Shower?
The best approach is to remove loose dirt first, clean from the higher surfaces downwards, allow suitable cleaning products enough time to work, then rinse and dry the shower thoroughly.
Before you begin, gather:
Microfibre cloths
A non-scratch sponge
A shower squeegee
A suitable bathroom cleaner
A limescale remover for hard-water deposits, if needed
An old soft toothbrush or small detailing brush
A bucket of warm water
Rubber gloves
Always check the manufacturer’s care instructions before using a cleaning product on specialist tiles, natural stone, coated glass or unusual shower finishes. Never mix cleaning chemicals, particularly products containing bleach with acidic limescale removers.
How to Clean Your Shower Step by Step
The order you clean in makes a difference. Working systematically prevents dirty water and cleaning solution from running back over areas you have already finished.
1. Remove Bottles and Loose Items
Take shampoo bottles, shower gel, razors, sponges and other items out of the shower.
Wipe the bottoms of bottles before putting them back later. They can collect a surprising amount of soap residue and standing water, which may leave marks on the shower tray or shelf.
This is also a good opportunity to throw away empty products and clean underneath anything that normally stays in the shower.
2. Rinse the Shower Surfaces
Use the showerhead to rinse the walls, doors, tray and fittings with warm water.
The purpose is to loosen hair, loose soap residue and surface dirt before you start scrubbing. If your shower has a removable showerhead, directing water towards the upper walls first allows loosened dirt to move downwards.
Avoid extremely hot water on surfaces that could be damaged by heat. Warm water is normally sufficient.
3. Clean the Shower Walls and Tiles
Apply a suitable bathroom cleaner according to its label instructions and work across the walls methodically.
Start at the higher sections and work downwards. Use a non-scratch sponge or microfibre cloth, paying particular attention to areas around the shower controls and where water regularly runs.
If the grout has become discoloured, do not simply scrub harder. Different grout and tile materials can require different cleaning methods. For more detailed bathroom maintenance, see our guide to cleaning a bathroom properly.
For stubborn soap deposits, allow the appropriate product to dwell for the time stated on its label before wiping. This can be much more effective than immediately applying more pressure.
4. Tackle the Shower Glass
Shower glass often develops cloudy marks because soap residue and hard-water minerals are repeatedly left behind as droplets evaporate.
Apply a suitable glass or bathroom cleaner and work over the surface with a microfibre cloth or non-abrasive sponge. Pay attention to the lower sections of the glass and corners, where deposits often accumulate.
If limescale is the main problem, use a product specifically designed for limescale and suitable for the type of glass or surrounding materials. Do not assume that a stronger product is automatically better.
For a more detailed guide to this particular job, you can follow our advice on cleaning shower glass properly.
5. Clean the Shower Fittings
Wipe the showerhead, taps, controls, rails and other fittings with a suitable cleaner and a soft cloth.
Chrome and other finishes can become scratched by abrasive powders, rough scouring pads or aggressive scrubbing. Use gentle pressure and rinse away cleaning products rather than allowing them to dry on the surface.
If limescale has built up around taps or the showerhead, use an appropriate limescale treatment and follow the manufacturer’s instructions. Some finishes cannot tolerate acidic products, so check before treating them.
6. Clean the Shower Tray or Floor
Hair and residue commonly collect around the drain, edges and corners of the shower tray.
Remove visible hair and debris first. Then clean the tray using a suitable bathroom cleaner and a non-scratch sponge.
Work around the drain and along the edges where the tray meets the wall. These areas can retain moisture and residue even when the centre of the tray looks clean.
If you notice persistent drainage problems, do not keep pouring cleaning chemicals down the drain. Remove accessible debris safely and investigate the underlying problem.
7. Rinse Thoroughly
Once the surfaces have been cleaned, rinse away the cleaning products and loosened dirt.
Rinsing is particularly important when using products that should not be left on the surface. Follow the label instructions rather than assuming that every cleaner should be rinsed in the same way.
Work from the top down so that dirty water does not repeatedly run over surfaces you have already cleaned.
8. Dry Everything Properly
Drying is one of the most overlooked parts of shower cleaning.
Use a squeegee on the glass and smooth surfaces, then wipe remaining moisture from fittings, edges and other areas with a clean microfibre cloth.
Removing water reduces the amount of residue left behind as droplets evaporate. It also helps the shower dry more quickly between uses.
If you want to make your wider cleaning routine easier to organise, explore KeepShine’s free downloadable cleaning resources.
Pro Tip

Professional cleaners often work in sections rather than repeatedly going over the entire shower. Divide the shower into glass, walls, fittings and tray, finish each area properly, then rinse and dry. This keeps your cloths cleaner, reduces cross-contamination and makes it easier to notice areas that need extra attention.
How to Deal With Limescale, Soap Scum and Grout
Different types of shower dirt need different approaches. Trying to remove everything with the same product can waste time and, on some surfaces, cause damage.
Limescale
Limescale is caused by mineral deposits from hard water. It commonly appears as white, chalky or cloudy marks around taps, glass and shower fittings.
Use a suitable limescale remover according to its instructions, and make sure it is safe for the surface. Acidic limescale products should not automatically be used on every material, particularly natural stone and some specialist finishes.
Never mix limescale remover with bleach or other cleaning chemicals.
Soap Scum
Soap scum is usually a combination of soap residue, body oils and minerals. It can leave a dull, sticky or cloudy film.
A suitable bathroom cleaner and mechanical wiping with a non-scratch sponge are often enough when the build-up is moderate. For heavier deposits, allow the product time to work rather than immediately scrubbing aggressively.
Grout
Grout needs particular care because it is more porous and textured than many surrounding surfaces.
Use a suitable grout-cleaning method for the type of grout you have and avoid unnecessarily aggressive brushing. If grout remains persistently dark, damaged or deteriorated after cleaning, the issue may not simply be surface dirt.
For more general advice on maintaining this part of the room, see our guide to how often your shower should be cleaned.
Keeping the Shower Cleaner for Longer
You do not have to perform a deep clean every time you use the shower. Small habits can reduce the amount of work required later.
After showering:
Use a squeegee on the glass and smooth walls.
Leave the shower area ventilated so moisture can escape.
Avoid leaving bottles sitting in pools of water.
Remove visible hair from around the drain.
Wipe obvious splashes from fittings when necessary.
A little daily attention can make the next proper clean considerably easier.
Mistakes to Avoid
Using too much cleaning product: More product does not necessarily mean better cleaning. Excess cleaner can leave residue behind and may make surfaces harder to rinse properly. Follow the label directions.
Scrubbing delicate surfaces with abrasive tools: Rough scourers and abrasive powders can scratch finishes and glass. Start with the least abrasive suitable method.
Leaving chemicals on surfaces indefinitely: A product should only be left to dwell for the time recommended on its label. Longer is not automatically more effective.
Mixing cleaning chemicals: Never combine different cleaning products unless the manufacturer specifically states that they can be used together. Some combinations can release dangerous fumes.
Ignoring the shower drain: Hair and residue can accumulate around the drain even when the rest of the shower looks clean. Check it regularly and remove accessible debris safely.
Cleaning but not drying: Leaving large amounts of water on glass and fittings encourages mineral deposits to remain after evaporation. Squeegeeing and drying are simple but important finishing steps.
If your shower has heavy build-up or you simply prefer to leave the job to someone else, KeepShine can help with professional cleaning.
More Questions About Keeping Your Shower Clean
Here are a few other useful questions that often come up when maintaining a clean shower.
How often should I clean my shower?
A quick rinse, squeegee and removal of visible hair after use can help keep the shower under control, while a more thorough clean is usually needed regularly depending on how often the shower is used and how quickly residue builds up.
Homes with several people using the same shower may need more frequent cleaning than a lightly used bathroom.
What should I clean first in a shower?
Start by removing bottles and loose items, then rinse away loose dirt. Clean higher surfaces before lower ones and finish with the shower tray or floor. This prevents dirty water and loosened residue from falling onto areas you have already cleaned.
Can I use vinegar to clean shower limescale?
Vinegar can help with some mineral deposits, but it should not be treated as a universal shower cleaner. It may be unsuitable for certain natural stones, finishes and materials. Check the surface manufacturer’s guidance before using acidic products.
How do I stop shower glass from becoming cloudy?
Regularly removing water with a squeegee is one of the simplest ways to reduce the residue left behind when water droplets evaporate. Keeping the glass clean and dry between thorough cleans can also make heavier build-up less likely.
Should I clean the shower every day?
You do not necessarily need to perform a full clean every day. However, quick maintenance such as removing hair, rinsing away residue and squeegeeing the glass can take very little time and helps reduce the amount of work needed during a deeper clean.
How can I clean my whole bathroom efficiently?
Work systematically rather than jumping between unrelated areas. Clean from cleaner and higher surfaces towards lower areas, use separate cloths where appropriate, and finish by checking floors and other areas where dirty water may have collected. For a complete routine, see our guide to cleaning your bathroom from top to bottom.
Subscribe to KeepShine for more practical cleaning guides, useful household tips and resources to help you keep your home easier to manage.
Final Thoughts: Make Shower Cleaning Part of Your Routine
A clean shower does not depend on spending hours scrubbing it every week. The biggest difference usually comes from using the right method consistently: remove loose dirt first, work from top to bottom, give suitable products enough time to work, rinse properly and finish by removing excess water.
It is also worth dealing with small problems before they become stubborn build-up. A few seconds with a squeegee after showering can save much more effort later.
Once you have a routine that works for your household, shower cleaning becomes a straightforward part of bathroom maintenance rather than a major job that has to be tackled from scratch.