
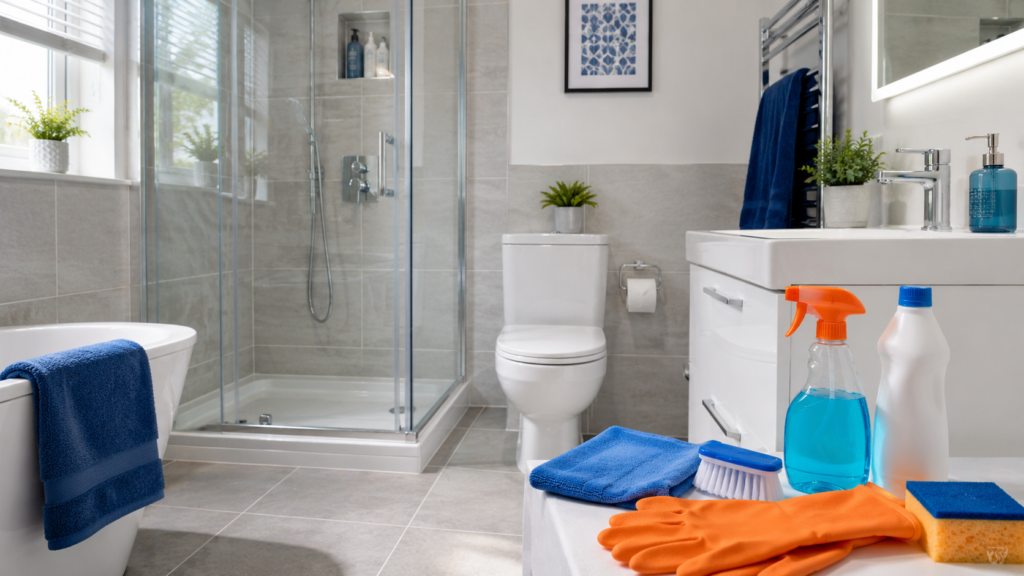
Keeping a bathroom clean is much easier when you follow the right order. This bathroom cleaning guide shows you how to clean a bathroom properly from top to bottom.
Bathrooms collect soap residue, limescale, dust, hair, toothpaste marks and moisture surprisingly quickly. Cleaning without a clear method can mean wiping the same areas twice, spreading dirt around or spending longer than necessary.
A good routine does not need to be complicated. By preparing the room first, allowing cleaning products time to work and moving systematically from cleaner areas towards dirtier ones, you can get better results with less wasted effort.
What You Need Before You Start
Before cleaning, gather everything you need so you are not repeatedly leaving the bathroom halfway through the job. The exact products will depend on your surfaces and fixtures, but a basic bathroom cleaning kit may include:
- Microfibre cloths
- A non-scratch sponge
- Toilet brush
- Bathroom cleaner
- Toilet cleaner
- Glass or mirror cleaner
- Mop and bucket or suitable floor-cleaning equipment
- Vacuum cleaner or dustpan and brush
- Rubber gloves
- An old toothbrush or small cleaning brush for awkward areas
Always read product labels before use, especially on natural stone, painted surfaces, specialist finishes or delicate fittings. Never mix cleaning chemicals unless the manufacturer specifically says it is safe to do so.
Open a window or use the extractor fan where possible to improve ventilation while you work.
If you are wondering how regularly the whole job needs doing, our practical bathroom cleaning schedule can help you separate quick regular jobs from less frequent cleaning tasks.
How to Clean Your Bathroom Step by Step
The best way to clean a bathroom is to work in a sensible order. Start by clearing and dusting, clean the main surfaces next, leave the toilet until later and finish with the floor. This prevents you from undoing work you have already completed.
1. Clear the Bathroom
Start by removing items that would get in your way.
Take toiletries, toothbrush holders, bath products, towels, bath mats, bins and other movable items away from the surfaces you need to clean. Empty the bathroom bin and remove anything that no longer belongs in the room.
Do not simply move bottles from one side of the bath to the other as you clean. Clearing the area properly gives you access to the surfaces underneath, where dust, water marks and product residue often collect.
This is also a good opportunity to discard empty containers and wipe down bottles before returning them later.
2. Remove Dust, Hair and Loose Debris
Before introducing water and cleaning products, remove dry dirt.
Dust shelves, window sills, light fittings and other accessible higher surfaces. Pay attention to extractor-fan covers and vents if they can be safely cleaned according to their manufacturer’s instructions.
Vacuum or sweep loose hair and dust from the floor, including around the toilet and behind the door.
Removing dry debris first prevents hair and dust from turning into a wet mess once you start wiping and mopping.
3. Apply Cleaner Where It Needs Time to Work
Apply suitable bathroom cleaner to areas with soap residue, everyday grime or limescale, following the product instructions.
Giving the product its recommended contact time can reduce unnecessary scrubbing. Do not assume that leaving a product on for much longer will make it work better; some surfaces can be damaged by prolonged exposure.
For a bathroom that has accumulated considerably more dirt than your normal routine can handle, you may need a more detailed bathroom deep-cleaning method.
4. Clean the Shower and Bath
Start with the shower walls, screen or curtain area before moving down towards the shower tray or bath.
Remove soap residue and body-product build-up using a cleaner that is suitable for the surface. Pay particular attention to corners, edges, around fittings and the areas where bottles normally sit.
Clean the shower screen on both sides if accessible. Rinse surfaces where the cleaning product requires rinsing, then dry or buff them with a clean cloth to reduce water marks.
For the bath, clean around the taps, overflow and plug area as well as the main surface. Avoid abrasive pads on surfaces that may scratch.
5. Clean the Sink, Taps and Surrounding Area
Remove everything from around the basin before cleaning it.
Clean the basin from the outer edges towards the bowl, paying attention to the overflow opening, plug and the area around the base of the taps. These small spaces can collect toothpaste, soap and grime.
Use a small brush where necessary to reach tight joins without scratching the finish.
Wipe the taps with a product appropriate for their material and dry them afterwards. Drying is a small extra step that can make taps look considerably cleaner because it removes remaining droplets and streaks.
6. Clean the Toilet Thoroughly
Leave the toilet until most other surfaces have been completed and use separate cleaning cloths or disposable paper where appropriate to avoid transferring contamination elsewhere.
Apply toilet cleaner according to its instructions and clean the inside of the bowl with a toilet brush, including beneath the rim where accessible.
Then clean the outside systematically: cistern, flush control, lid, seat, hinges, rim and exterior of the bowl.
For more detail on this particular job, follow our step-by-step guide to cleaning a toilet properly.
Wash your hands thoroughly when you have finished, even if you wore gloves.
7. Clean Mirrors and Finishing Surfaces
Use a suitable glass or mirror cleaner and a clean microfibre cloth to remove toothpaste spots, fingerprints and water marks.
Avoid spraying excessive cleaner around the edges of mirrors, particularly where the manufacturer’s instructions advise against moisture reaching the backing or frame.
Wipe shelves, handles, switches and other frequently touched surfaces with a suitable product. Take appropriate care around electrical fittings: never saturate switches, sockets or powered equipment with liquid.
8. Return Clean Items
Before replacing toiletries and accessories, wipe any dirty or sticky containers.
Replace fresh towels and put back the bath mat only when the surrounding areas are clean and dry.
Keeping frequently used products organised rather than crowding every available surface also makes future cleaning considerably easier.
9. Mop the Floor Last
Once everything above has been cleaned, finish with the floor.
Vacuum or sweep again if necessary, particularly if more hair or debris has fallen while you worked. Then mop using a cleaning method suitable for your flooring.
Start at the furthest point from the doorway and work towards the exit so you do not have to walk over the freshly cleaned floor.
Pay attention to corners, around the toilet base and along edges, but avoid flooding the floor with water. Allow it to dry properly before replacing mats.
Explore KeepShine’s free downloadable cleaning resources for practical ways to make household cleaning easier to organise.
Pro Tip
Keep several microfibre cloths available and assign them to different bathroom areas rather than relying on one cloth for the entire room. In particular, keep the cloth used around the toilet separate from those used for the sink, taps and other surfaces, and change cloths when they become visibly dirty.
How to Keep Your Bathroom Cleaner Between Full Cleans
A thorough clean is important, but what you do between cleaning days can make an even bigger difference to how manageable the bathroom feels.
Moisture is one of the main challenges. After bathing or showering, use the extractor fan or open a window where safe and practical. Wiping excess water from shower screens and very wet surfaces can also help reduce the residue left behind as water dries.
Try not to let toiletries take over every available surface. Fewer items around the sink and bath mean fewer objects to move and fewer hidden areas where dust and grime can accumulate.
Deal with small messes when you notice them. Wiping toothpaste from the basin or a fresh splash from the mirror takes seconds; once marks have dried and accumulated, they often require more effort.
Regular light cleaning also prevents every bathroom clean from becoming a major task. Our guide to keeping your bathroom clean for longer has more practical ideas for maintaining the room between deeper cleans.
It is still worth planning occasional more detailed cleaning for areas that are easy to overlook, such as behind movable items, around fittings and along edges. The aim is not to clean everything intensely every day, but to stop small amounts of dirt gradually becoming a much bigger job.
Mistakes to Avoid
- Mixing cleaning chemicals. Combining products can create dangerous fumes or reactions. Use products according to their labels and never mix bleach with acidic cleaners, ammonia-containing products or other chemicals.
- Using one cloth everywhere. Cleaning the toilet and then wiping the sink or taps with the same cloth can transfer contamination around the bathroom. Keep toilet-cleaning materials separate and change dirty cloths as you work.
- Using abrasive tools on delicate surfaces. A rough scourer may remove grime quickly but can also scratch baths, taps, shower screens and other finishes. Check what the surface manufacturer recommends before using abrasive products.
- Cleaning the floor too early. If you mop first, dust, hair and droplets from cleaning higher surfaces may fall onto your freshly cleaned floor. Leave the final floor clean until the rest of the bathroom is finished.
- Using too much cleaning product. More product does not necessarily mean better cleaning. Excess cleaner can leave residue and create additional wiping or rinsing. Follow the quantity and usage directions on the label.
- Ignoring damp areas after cleaning. Leaving surfaces unnecessarily wet can encourage water marks and keep the bathroom humid. Drying shower screens, taps and other appropriate surfaces gives a better finish and helps reduce moisture left behind.
- Waiting until every bathroom clean becomes a deep clean. Small, regular tasks usually make cleaning more manageable. Our guide to common bathroom cleaning mistakes explains more habits that can make the job harder than necessary.
If keeping on top of the bathroom is becoming difficult, KeepShine can provide professional cleaning help when you would rather leave the job to someone else.
More Questions About Keeping Your Bathroom Clean
Bathroom cleaning often raises a few practical questions beyond the main routine, so here are answers to some of the most useful ones.
How often should a bathroom be cleaned?
There is no single schedule that suits every household. A heavily used family bathroom will usually need attention more frequently than a lightly used guest bathroom. Wiping spills, rinsing obvious residue and dealing with the toilet regularly can make the deeper clean easier. Rather than relying only on a fixed timetable, increase the frequency when you notice visible grime, odours or build-up.
Should I clean the bathroom from top to bottom?
Generally, yes. Dust and debris naturally fall as you work, so cleaning higher surfaces before lower ones prevents you from repeatedly cleaning the same areas. The floor should normally be one of your final tasks.
This same principle is useful elsewhere in the home, including when you clean a kitchen properly.
Should I clean the toilet or shower first?
There is no absolute rule, but it is useful to apply products that require contact time early and clean the toilet with separate equipment. For the room generally, working from higher and cleaner areas towards lower or dirtier areas helps prevent you from repeatedly re-cleaning surfaces.
How can I keep the shower screen cleaner for longer?
Removing water from the screen after showering can reduce the droplets left to dry on the glass. A shower squeegee can make this quick. Regularly dealing with light soap residue is also easier than allowing several weeks of build-up to accumulate.
Why does my bathroom still look dirty after I clean it?
Small details often make the difference. Water marks on taps, dusty edges, dirty grout, residue around bottle bases, marks on mirrors and hair along floor edges can remain even after the main surfaces have been wiped. Working systematically and checking the room once surfaces have dried can reveal areas you missed.
Can I use the same cleaner on every bathroom surface?
Not necessarily. Bathrooms can contain glass, ceramic, chrome or other metal finishes, plastic, painted materials, natural stone and different types of flooring. A product that works well on one may damage another. Check both the cleaning-product label and the surface manufacturer’s care guidance when you are unsure.
How can I make bathroom cleaning quicker each week?
Preventing heavy build-up is usually easier than repeatedly removing it. Put toiletries back after use, wipe obvious splashes, keep the room ventilated appropriately, remove hair before it accumulates and deal with small areas of residue when you notice them. These short maintenance jobs can make your next thorough clean much more manageable.
Subscribe to KeepShine for more practical cleaning guides, simple household tips and useful resources to help make everyday cleaning easier.
Final Thoughts: Make Bathroom Cleaning Part of a Simple Routine
A clean bathroom is easier to maintain when you work systematically rather than waiting until every surface needs serious attention.
Clear the room first, remove dry dirt before introducing water, give suitable cleaning products time to work, move through the main surfaces in a sensible order and finish with the floor. Small cleaning jobs between full cleans can then prevent grime from building up again.
The same organised approach can make other rooms easier too. When you are ready to continue, our step-by-step bedroom cleaning guide can help you apply a similarly practical routine elsewhere in your home.