
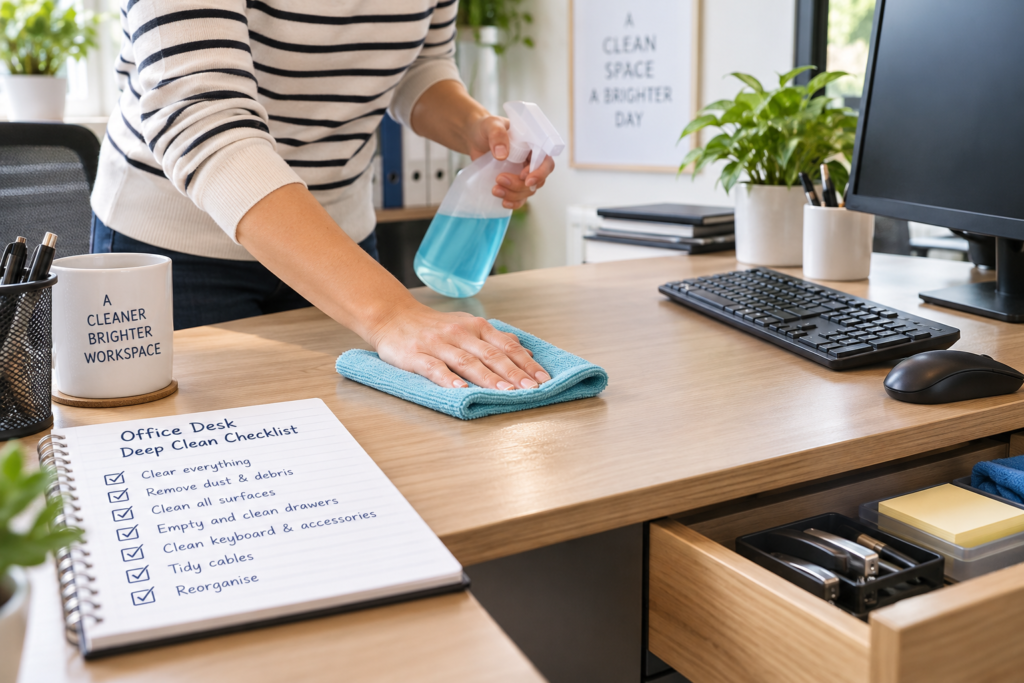
A deep cleaning of your office desk removes the dust, grime and hidden dirt that everyday wiping can miss, leaving your workspace properly refreshed.
Desks can look reasonably clean while still collecting dust behind equipment, crumbs inside drawers, fingerprints around handles and dirt beneath keyboards, monitors and other items. A thorough clean goes beyond clearing the surface and wiping around whatever happens to be there.
The key is to work methodically: empty the desk, remove loose dirt, clean each suitable surface safely, deal with frequently touched items and allow everything to dry before putting your workspace back together.
What to Know Before Deep Cleaning Your Office Desk
Before you start, check what your desk and equipment are made from. Solid wood, laminate, glass, painted surfaces and specialist finishes may require different cleaning methods. If you are unsure, check the manufacturer’s care instructions and test any cleaning product on a small, inconspicuous area first.
Gather what you are likely to need before dismantling your workspace:
- Microfibre cloths
- A soft duster or clean brush
- A vacuum cleaner with a suitable attachment
- A mild cleaner appropriate for the desk surface
- Warm water where suitable
- A small container for loose stationery
- Rubbish and recycling bags
For a lighter routine between deep cleans, our guide to cleaning an office desk properly covers the regular cleaning process.
How to Deep Clean an Office Desk Step by Step
Deep cleaning is easiest when you work from an empty desk rather than trying to clean around paperwork, electronics and stationery. Give yourself enough time to complete the job without rushing the drying and reorganisation stages.
1. Clear everything from the desk
Remove paperwork, stationery, decorations, storage trays and other movable objects.
Sort items as you go rather than simply transferring the clutter to another surface. Put rubbish straight into the bin, separate recycling and set aside documents that need filing or shredding.
Removing everything gives you access to areas that are normally hidden and makes it much easier to see where dirt has accumulated.
If you are cleaning a desk as part of a larger workspace refresh, you can also follow our guide to cleaning an office properly.
2. Safely move or disconnect electrical equipment
Switch off computers, monitors, lamps and other electrical equipment before cleaning around them. Unplug equipment where appropriate and safe to do so.
Never spray cleaning liquid directly onto electrical equipment, sockets, plugs or cable connections. If you need to clean a particular device, follow its manufacturer’s instructions.
Take a quick photo of complicated cable arrangements before disconnecting anything. It can make setting everything back up considerably easier.
3. Remove dust and loose debris
Before using a damp cloth, remove dry dirt.
Dust the desktop, edges, legs, shelving and other accessible parts of the desk. Pay particular attention to corners, joins, cable openings and the area along the back of the desk.
Use a vacuum with an appropriate attachment for crumbs and debris where suitable. Avoid dragging a hard vacuum attachment across surfaces that could scratch.
Working dry first prevents loose dust from turning into dirty streaks when moisture is introduced.
4. Clean the desktop thoroughly
Choose a cleaning method suitable for the material.
For many sealed laminate desks, a lightly damp microfibre cloth with an appropriate mild cleaner may be sufficient. Avoid soaking the surface, particularly around joins, edges and damaged areas where moisture could penetrate.
Wooden desks need more care because finishes vary considerably. Use products and methods recommended for the particular finish rather than assuming a general-purpose cleaner is suitable.
For glass desktops, use an appropriate glass-cleaning method and buff away streaks with a clean cloth.
Whichever surface you have, avoid saturating it. Apply cleaner to the cloth rather than spraying excessively across the desk, particularly when electrical equipment is nearby.
5. Clean the edges, underside and desk legs
These areas are easy to overlook during normal cleaning.
Wipe the front and side edges, paying particular attention to the section where your hands and arms regularly rest. Clean suitable desk legs, supports and accessible framework.
Carefully inspect the underside as well. Dust can gather along supporting bars and underneath the desktop, while fingerprints and marks may build up around drawers and handles.
Do not forget cable-management trays or accessible channels. Remove dust carefully without pulling or damaging cables.
6. Empty and clean the drawers
Take everything out of each drawer.
Remove crumbs, pencil shavings, scraps of paper and other loose debris using a vacuum attachment or suitable brush. Wipe the inside according to the material and allow it to dry fully.
Use this opportunity to remove dried-up pens, unnecessary duplicates and items you no longer use.
Clean drawer fronts, handles and the surrounding areas before replacing only the things you actually need.
7. Clean frequently touched desk items
A thoroughly clean desk can quickly feel dirty again if everything returned to it is dusty.
Wipe suitable items such as pen holders, document trays, staplers and other accessories according to their materials. Clean the outside of electrical devices only in accordance with their manufacturer’s instructions.
Your keyboard deserves particular attention because dust and debris can accumulate between the keys. Our separate guide explains how to clean an office keyboard properly.
Clean your mouse and other regularly handled equipment using methods recommended by their manufacturers.
8. Deal with cables and the area behind the desk
If you can safely access the back of the desk, remove accumulated dust from the surrounding area.
Dust accessible cables carefully while equipment is switched off and disconnected where appropriate. Do not apply liquid to plugs, sockets or electrical connections.
If the desk can be moved safely without damaging flooring or equipment, clean the floor underneath and behind it. Do not attempt to move a large or heavy desk by yourself.
9. Allow surfaces to dry
Give damp-cleaned areas time to dry completely before replacing paperwork, electrical equipment or storage items.
This is particularly important inside drawers and around areas where equipment will sit.
Use a clean, dry microfibre cloth to remove any remaining moisture or streaks where appropriate.
10. Reassemble your workspace thoughtfully
Return your computer equipment first, reconnecting everything safely.
Then replace the items you actually use. Keep frequently needed objects within easy reach and store less-used supplies in drawers or suitable storage.
Try not to refill every available space simply because it was occupied before. A less cluttered desk is generally easier to wipe, dust and maintain.
For guidance on how often this more thorough process is worthwhile, see our practical office desk cleaning schedule.
Explore KeepShine’s free downloadable cleaning resources for practical ways to make regular cleaning and household organisation easier.
Pro Tip

After moving everything off your desk, take a moment to identify the places that are usually inaccessible rather than immediately starting to wipe. Cable openings, monitor stands, drawer handles, desk edges and the space behind equipment often reveal where a normal quick clean has been missing dirt.
Getting Your Desk Properly Clean Without Damaging It
Deep cleaning does not mean using stronger products or more water. In many cases, the safest thorough clean comes from gaining access to every area and using the correct method for each material.
Pay attention to the desk finish
Two desks that look similar may have very different surfaces. Veneered wood, solid wood, laminate and painted finishes can react differently to moisture and cleaning products.
Avoid assuming that a cleaner described as multipurpose is automatically appropriate. Follow care instructions where available and test unfamiliar products discreetly before using them widely.
Treat marks individually
If an ordinary wipe does not remove a mark, avoid immediately scrubbing harder. First consider what caused it and what material you are cleaning.
Aggressive scrubbing, abrasive pads or unsuitable chemicals can turn a small mark into permanent surface damage. Start with the gentlest appropriate approach and increase cleaning action only when you know the material can tolerate it.
Keep the clean desk easier to maintain
Once the desk is dry and organised, small habits can reduce how quickly dirt returns. Deal with drink spills promptly, remove rubbish regularly and avoid allowing unnecessary paperwork and objects to accumulate.
A quick routine clean is much easier when most of the desktop remains accessible. Our guide to keeping your office desk clean for longer covers useful maintenance habits between deeper cleans.
Mistakes to Avoid

- Spraying cleaner directly around electronics. Liquid can reach openings, cables or electrical connections. Apply an appropriate product to your cloth where suitable and follow the equipment manufacturer’s cleaning guidance.
- Using too much water. A desk does not need to be soaked to become clean. Excess moisture may enter joins, edges or damaged finishes and can be particularly unsuitable for some wood-based materials.
- Using the same product on every surface. A cleaner that works well on glass or laminate may not be appropriate for finished wood, painted surfaces or electronics. Check the material before choosing your method.
- Scrubbing stubborn marks aggressively. Abrasive pads and excessive pressure can scratch or dull some finishes. Begin with the gentlest suitable treatment rather than trying to force a mark away.
- Putting dirty items straight back. Cleaning the desktop but returning dusty organisers, equipment and accessories reduces the benefit of a deep clean. Clean suitable items before replacing them.
- Rushing through hidden areas. The places underneath equipment, inside drawers and around cables are part of what distinguishes a deep clean from an everyday wipe. Our guide to office desk cleaning mistakes to avoid covers other habits that can undermine your results.
If keeping desks and the wider workplace thoroughly clean is becoming difficult to manage, KeepShine can provide professional cleaning help to suit your premises.
More Questions About Deep Cleaning Your Office Desk
A few practical questions often come up when deciding how to deep clean an office desk safely and how thorough the process needs to be.
How often should I deep clean my office desk?
There is no single schedule that suits every desk. How frequently it needs a deep clean depends on how heavily it is used, whether food is eaten there, how quickly dust accumulates and whether several people use the same workspace. Regular surface cleaning can reduce the need for very frequent deep cleaning.
Should I disinfect my office desk as well as clean it?
Cleaning and disinfecting are not identical. Whether disinfection is appropriate depends on the situation and surface. If you choose to use a disinfectant, make sure it is suitable for the material and follow the product instructions, including any required contact time. Never mix cleaning chemicals.
Can I deep clean a wooden office desk with water?
That depends on the wood and its finish. Some sealed surfaces may tolerate careful damp cleaning, while others require specific care. Avoid saturating wood and check the manufacturer’s instructions where possible. If you are uncertain, test the proposed method on a discreet area first.
Do I need to remove my computer when deep cleaning the desk?
Moving equipment makes it much easier to reach dust underneath and behind it, but it must be done safely. Shut equipment down properly and disconnect it where appropriate. If equipment is difficult to move, particularly in a workplace setting, follow your organisation’s procedures rather than risking damage.
What should I do if my desk still looks dirty after cleaning?
Look closely at whether you are dealing with removable dirt or permanent wear, staining or surface damage. Repeatedly applying stronger cleaners may make matters worse. Check the desk’s care guidance before attempting another treatment, especially on wood, painted or specialist finishes.
Should I deep clean the rest of my workspace at the same time?
It can be useful. Dust on nearby shelving, flooring and equipment can quickly find its way back onto a freshly cleaned desk. If you are planning a larger clean, tackling the surrounding workspace at the same time can produce a more complete result.
For another detailed cleaning method that can be useful elsewhere in the home, see our guide to cleaning a bedroom properly.
Subscribe to KeepShine for more practical cleaning guides, straightforward tips and useful resources for keeping your home and workspace cleaner.
Final Thoughts: Make Your Deep Clean Last
A thorough office desk clean is most effective when you remove everything first and work systematically rather than simply wiping the visible surface.
Once the hidden dust, drawer debris, marks and everyday grime have been dealt with, keeping the desk tidy becomes much easier. Regularly remove rubbish, deal with spills when they happen and give accessible surfaces a routine clean before dirt has time to build up.
You do not need aggressive products or complicated equipment to achieve a good result. The right method for the desk material, careful cleaning around electronics and attention to commonly missed areas can make the biggest difference.
A cleaner, less cluttered desk also gives you a much simpler starting point for your next routine clean.