
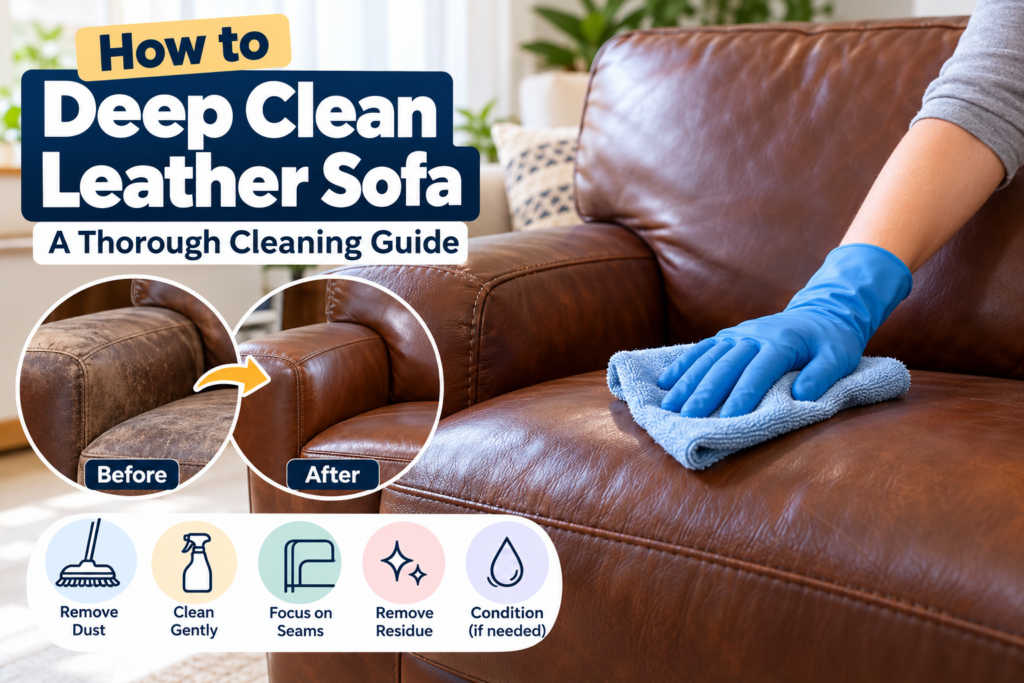
Leather sofas collect body oils, dust, crumbs and everyday grime, even when they look reasonably clean. Knowing how to deep clean a leather sofa properly helps remove this build-up while protecting the leather’s finish, softness and appearance.
Unlike fabric upholstery, leather needs a more careful approach. The wrong cleaning product, excessive moisture or aggressive scrubbing can cause discolouration, dryness or permanent damage. Fortunately, with the right supplies and a method suited to your sofa’s leather type, you can give it a thorough clean at home.
What Is the Safest Way to Deep Clean a Leather Sofa?
The safest way to deep clean a leather sofa is to remove loose dirt first, clean the surface gently with a product approved for its leather type, and dry it with a soft cloth. If the manufacturer recommends conditioning, apply a compatible leather conditioner afterwards.
Before starting, check the sofa’s care label or manufacturer’s instructions. Finished leather, aniline leather, nubuck and suede have different cleaning requirements, so a method suitable for one may damage another.
For most suitable finished-leather sofas, you will need:
A vacuum cleaner with a soft brush attachment.
Several clean, soft microfibre cloths.
A leather cleaner approved for your sofa’s finish.
A small amount of clean water, if permitted by the care instructions.
A compatible leather conditioner, if recommended.
Allow approximately 30–60 minutes for cleaning an average sofa, excluding drying time, although heavily soiled furniture may take longer.
The most important rule is to use as little moisture as necessary and test every cleaning product on a hidden area before applying it to the visible upholstery.
How to Deep Clean a Leather Sofa Step by Step
Follow these steps to remove everyday dirt and grime without putting unnecessary stress on the leather.
Step 1: Check the Leather Type and Care Instructions
Before applying anything, establish what type of leather your sofa has.
Finished or protected leather has a surface coating that generally makes it more resistant to everyday spills and dirt. Aniline leather is more absorbent and can develop water marks or changes in colour more easily. Nubuck and suede have textured surfaces that require specialist care.
Check the manufacturer’s guidance for suitable cleaning products and methods. If the leather type is unknown, avoid experimenting with homemade solutions or applying water liberally.
For valuable, delicate or antique furniture, professional advice may be the safest option.
Step 2: Remove Cushions and Vacuum Thoroughly
Take off any removable cushions and check underneath them. Dust, crumbs, pet hair and other debris often collect in these areas.
Use a vacuum cleaner with a soft upholstery attachment to remove loose dirt from the seat surfaces, backrests, creases and accessible gaps.
Pay particular attention to seams and the spaces between cushions. Dirt trapped in these areas can act as an abrasive when you wipe the leather, potentially wearing down its finish over time.
Use a soft brush or a clean, dry cloth for areas that are difficult to reach. Avoid sharp vacuum attachments and excessive pressure, particularly around stitching and delicate edges.
If your sofa also has fabric sections, clean those according to their own care instructions rather than treating them as leather.
Step 3: Test the Leather Cleaner
Choose a leather cleaner specifically approved for your sofa’s leather type.
Do not assume that a product labelled suitable for leather will work safely on every finish. Avoid general-purpose household sprays, abrasive cleaners and products containing solvents unless the manufacturer explicitly approves them.
Apply a small amount of the cleaner to an inconspicuous area, following the product instructions. Check for changes in colour, texture, sheen or surface feel.
Allow the test area to dry fully before deciding whether the product is suitable. A change may not be obvious while the leather is still damp.
If the test area becomes sticky, noticeably darker, patchy or otherwise altered, stop and seek advice before continuing.
Step 4: Clean the Leather Gently
Once the cleaner has passed the test, work on one manageable section at a time.
Apply the cleaner to a soft cloth if the product instructions permit this method. Avoid soaking the upholstery or spraying liquid directly into seams, stitching and cushion gaps.
Wipe gently using light, even movements. Pay attention to armrests, seat fronts and headrests, where body oils and everyday contact often cause more noticeable build-up.
Turn the cloth frequently so that you are not spreading dirt back over the surface. Use a fresh section of cloth when it becomes visibly dirty.
Do not scrub aggressively to remove stubborn marks. If grime does not lift with gentle cleaning, repeated friction can do more harm than good.
For additional guidance on routine care, see our guide to cleaning a leather sofa properly.
Step 5: Pay Attention to Seams and Creases
The gaps between cushions, stitched seams and folds around the armrests can hold more dirt than the open surfaces.
Use a soft cloth to clean accessible areas carefully. If the manufacturer permits it, a soft brush can help loosen dirt around seams without applying excessive pressure.
Avoid forcing liquid into stitching or using sharp tools to dislodge trapped debris. Moisture that remains inside seams may be difficult to remove and can affect the materials beneath the leather.
If grime is deeply embedded or the stitching appears damaged, leave the area alone rather than risking further deterioration.
Step 6: Remove Residue and Let the Sofa Dry
Follow the cleaner’s instructions regarding removal. Some products require a separate wipe with a clean, lightly damp cloth, while others should be left on the surface as directed.
Never rinse the sofa with large amounts of water.
If wiping is required, use a clean cloth and remove excess moisture promptly. Then allow the sofa to air-dry naturally in a well-ventilated room.
Avoid hairdryers, radiators, direct sunlight and other strong heat sources. Rapid or uneven drying can affect the leather’s appearance and condition.
Do not sit on the sofa until the surface is dry and the product instructions permit normal use.
Step 7: Condition the Leather if Appropriate
Some leather sofas benefit from a suitable conditioner, but conditioning is not necessary for every type of leather or every cleaning routine.
Check the manufacturer’s recommendations before applying one. Use a product compatible with the leather finish, and test it on a hidden area first.
Apply only the amount directed by the manufacturer. Excess conditioner may leave the surface greasy, attract dirt or change the finish.
Allow the product to absorb or dry as instructed, removing any excess where required.
Your sofa should now be cleaner and more comfortable to use, without unnecessary exposure to moisture or harsh chemicals.
Explore KeepShine’s free cleaning resources for practical ways to organise your household cleaning and keep everyday tasks manageable.
Pro Tip

Keep a clean microfibre cloth specifically for your leather sofa and use it to remove fresh dust and fingerprints between deeper cleans. Regular light maintenance reduces the amount of rubbing needed during a thorough clean, which is particularly helpful on frequently used armrests and headrests. Always use the cloth dry unless your sofa’s care instructions recommend otherwise.
How to Deal With Stubborn Dirt and Keep Leather Looking Its Best
Some areas of a leather sofa need more attention than others. Armrests may accumulate body oils, seat cushions can develop darkened patches, and spills may leave visible marks even after the surrounding surface has been cleaned.
The key is to identify the problem before choosing a treatment.
Removing Body Oils and Everyday Grime
Armrests, headrests and the front edges of seat cushions often become darker because of repeated contact with skin, hair products and clothing.
Clean these areas using a product approved for the leather finish. Work gently and avoid repeatedly treating the same spot with increasing amounts of cleaner.
If the darkening remains after appropriate cleaning, it may be caused by changes to the finish or the leather itself rather than removable dirt.
Handling Fresh Spills
Blot fresh spills promptly with a clean, absorbent cloth. Avoid rubbing, which can spread the liquid and make the affected area larger.
For water-based spills, follow the sofa manufacturer’s instructions rather than assuming water is always safe. Absorbent leather can develop marks when exposed to moisture.
Oil, ink and dye-transfer stains can be particularly difficult. Do not automatically apply washing-up liquid, alcohol, vinegar or other household remedies. These substances may damage the finish or make the stain harder to treat.
For difficult marks, specialist leather-care advice is preferable to repeated home experiments.
Maintaining the Sofa Between Deep Cleans
Prevention reduces the need for intensive cleaning. A practical maintenance routine includes:
Removing loose dust and crumbs regularly.
Wiping minor surface dirt with a suitable cloth.
Cleaning spills promptly using the recommended method.
Keeping the sofa away from excessive direct sunlight and strong heat.
Following the manufacturer’s guidance on conditioning and other aftercare.
If you also maintain the surrounding living room, our guide to cleaning a living room properly can help you build a more consistent household routine.
Mistakes to Avoid
– Using too much water. Excess moisture can leave marks on absorbent leather and may enter seams or cushion materials. Use the minimum amount permitted by the manufacturer’s instructions, and remove excess moisture promptly.
– Applying unsuitable household cleaners. Bleach, abrasive products, strong solvents and unapproved cleaning sprays can strip finishes, alter colour or damage the leather. Choose a cleaner designed for the specific leather type.
– Scrubbing stains aggressively. Heavy pressure can wear the surface, create shiny patches or spread the stain. Use gentle movements and stop if the mark does not lift.
– Skipping the patch test. A product that works on one sofa may damage another. Test it in a hidden area and allow the leather to dry fully before treating the rest.
– Using direct heat to speed up drying. Hairdryers, radiators and intense sunlight can cause uneven drying and affect the leather’s appearance. Let the sofa dry naturally in a well-ventilated room.
– Conditioning without checking compatibility. Not all leather finishes require conditioner, and unsuitable products may leave residue or alter the surface. Follow the manufacturer’s care advice instead of conditioning automatically.
If your leather sofa has stubborn stains, delicate upholstery or signs of damage, KeepShine can help you explore professional cleaning options suited to your needs.
More Questions About Deep Cleaning Leather Sofas
Here are answers to some common questions about keeping leather upholstery clean, comfortable and in good condition.
How Often Should You Deep Clean a Leather Sofa?
There is no single schedule that suits every household. Lightly used sofas may need only occasional deeper cleaning, while furniture used daily by children, pets or several household members may require attention more frequently. Remove dust and crumbs regularly, deal with spills promptly and follow the manufacturer’s recommendations. Avoid repeatedly applying cleaning products when the surface does not need them.
Can You Use Washing-Up Liquid to Clean a Leather Sofa?
Washing-up liquid is not automatically safe for leather upholstery. Its ingredients and concentration may affect the finish or leave residue, particularly if used repeatedly or without proper removal. Use a product approved for your sofa’s leather type. If the manufacturer specifically recommends a mild soap solution, follow its instructions carefully rather than improvising a stronger mixture.
Can You Use Vinegar to Deep Clean Leather?
Vinegar is not a universally safe leather cleaner. Its acidity may affect certain finishes, and homemade mixtures can produce unpredictable results on delicate or absorbent leather. Unless your sofa manufacturer specifically approves a particular method, choose a compatible leather-care product instead. If you are unsure about the finish, obtain advice before applying any acidic solution.
Why Does My Leather Sofa Look Patchy After Cleaning?
Patchiness can result from uneven moisture exposure, cleaner residue, changes to the surface finish or pre-existing wear that becomes more visible after dirt is removed. Allow the sofa to dry fully and check the manufacturer’s instructions before attempting further treatment. Avoid repeatedly cleaning the same area, as this may worsen the appearance. Seek specialist advice if the patchiness persists.
Does Every Leather Sofa Need Conditioning After Cleaning?
No. Whether conditioning is appropriate depends on the leather type, its finish and the manufacturer’s care recommendations. Some protected leather sofas need only gentle cleaning, while certain other finishes may benefit from specific conditioning products. Using an unsuitable product can leave a greasy film or change the appearance. Check the care instructions before adding conditioner to your routine.
Can You Deep Clean a Leather Sofa With a Steam Cleaner?
Do not assume steam cleaning is safe for leather upholstery. Heat and moisture can affect leather finishes, adhesives and the materials beneath the surface. Unless the sofa manufacturer explicitly approves a particular steam-cleaning method for your specific upholstery, avoid it. A compatible leather cleaner and gentle hand-cleaning method are generally the more appropriate starting points.
Subscribe to KeepShine for practical cleaning guides, helpful household tips and resources to help you care for your furniture with confidence.
Final Thoughts: Keep Your Leather Sofa Clean for Longer
A clean leather sofa does not require aggressive products or constant deep cleaning. The best results come from understanding the leather type, removing loose dirt regularly and using a suitable cleaner only when necessary.
Before your next cleaning session, check the manufacturer’s instructions and gather the right supplies. Work gently, test products before using them widely, and allow the upholstery to dry naturally.
Remember that not every dark patch is dirt, and not every stain can be safely removed at home. Recognising when to stop is just as important as knowing how to clean.
With sensible maintenance and the right approach, you can keep your sofa looking presentable, reduce unnecessary wear and enjoy your living room furniture for years to come.