
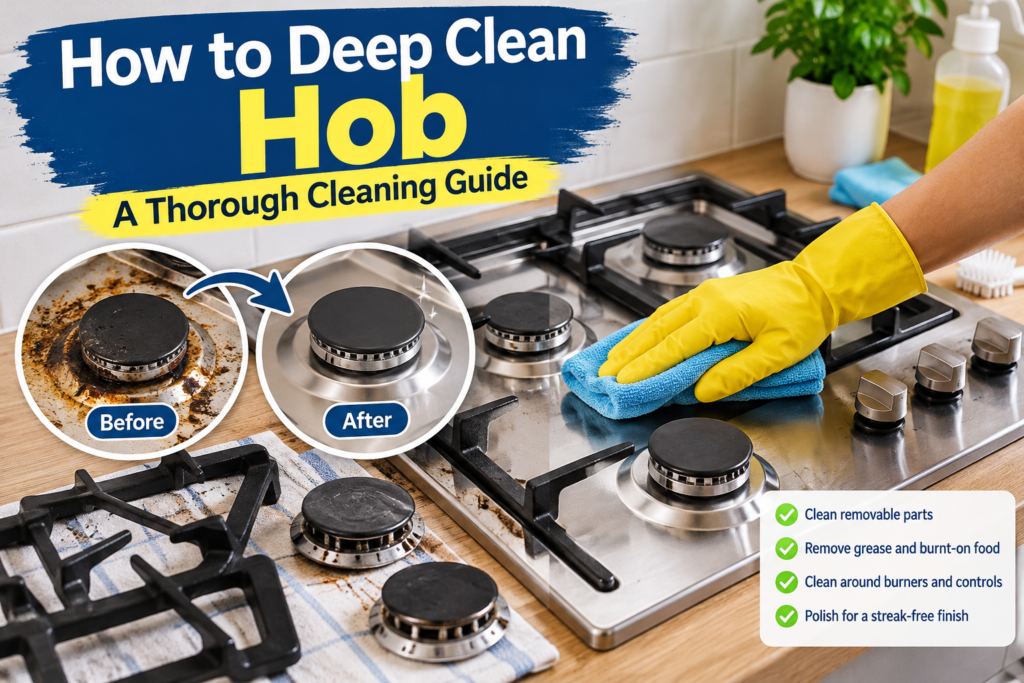
Deep cleaning a hob removes burnt-on food, greasy residue and stubborn marks that everyday wiping can leave behind. With the right cleaning method, you can restore a cleaner surface without damaging the finish or scratching delicate parts.
Whether you have a gas hob, ceramic hob, induction hob or stainless steel model, the key is to use suitable products and clean each component correctly. This guide explains how to deep clean your hob step by step, tackle stubborn grime and keep the cooking surface looking its best.
What You Need Before Deep Cleaning Your Hob
Before starting, identify your hob type and check the manufacturer’s care instructions. Different surfaces require different cleaning methods, and a product suitable for stainless steel may damage glass or ceramic.
For most hobs, you will need:
Warm water and washing-up liquid.
A soft microfibre cloth.
A non-abrasive sponge.
A soft cleaning brush or old soft-bristled toothbrush.
A dry microfibre cloth for polishing.
A hob cleaner suitable for your particular surface.
A non-abrasive scraper designed for glass hobs, if approved by the manufacturer.
Allow the hob to cool completely before cleaning. If you have a gas hob, make sure the burners are off. For electric and induction hobs, switch off the appliance and follow the manufacturer’s instructions before cleaning.
Avoid steel wool, harsh scouring pads and abrasive powders unless the manufacturer explicitly approves them. These can scratch surfaces, damage protective finishes or leave marks that are difficult to remove.
A thorough clean usually takes around 20–40 minutes, depending on the amount of grease and burnt-on food. Heavily soiled components may need additional soaking or repeated gentle cleaning.
How to Deep Clean a Hob Step by Step
Deep cleaning is most effective when you work methodically, starting with removable components and finishing with the main cooking surface. This prevents loosened grease and dirt from being spread across areas you have already cleaned.
Step 1: Switch Off and Prepare the Hob
Turn off the hob and allow every part to cool completely. Never apply cleaning products to a hot surface unless the product instructions specifically permit it.
Remove any loose crumbs, dried food particles and other debris using a soft cloth or a dry, soft brush.
If your hob has removable pan supports, burner caps or other detachable components, remove them carefully according to the manufacturer’s instructions.
Keep small components together so they do not get lost, and avoid pulling, twisting or dismantling parts that are not designed to be removed for routine cleaning.
Step 2: Remove and Clean the Removable Parts
For gas hobs, pan supports and removable burner caps often collect the most grease. These parts should be cleaned separately from the main hob surface.
Place suitable removable components in a bowl or sink containing warm water and a little washing-up liquid.
Allow greasy residue to soften for several minutes.
Use a soft sponge or brush to loosen food deposits.
Rinse components that are safe to rinse, following the manufacturer’s instructions.
Dry them thoroughly before putting them back.
Do not soak components unless the manufacturer confirms that soaking is safe. Some parts may have coatings or materials that require a different cleaning method.
Pay particular attention to the edges and undersides of pan supports, where grease can accumulate unnoticed.
Keep burner openings, gas injectors and electrical connections free from water and cleaning products. Do not poke objects into gas ports or use excessive force to remove blockages.
Step 3: Degrease the Main Hob Surface
Grease forms a thin film over the cooking surface, especially around frequently used burners and cooking zones.
Mix a small amount of washing-up liquid with warm water. Dampen a soft cloth or non-abrasive sponge and gently wipe the surface, concentrating on greasy areas.
For stubborn residue, hold the damp cloth against the affected area briefly to help soften the deposit. Avoid flooding the hob with water, particularly around burner openings, controls, seams and electrical components.
If ordinary washing-up liquid is insufficient, use a cleaner specifically approved for your hob material.
For a more detailed approach to routine maintenance, see our guide to cleaning a hob properly.
Step 4: Tackle Burnt-On Food and Stubborn Marks
Burnt food requires a little more patience than ordinary grease. Scrubbing aggressively can damage the surface without necessarily removing the deposit.
For a glass-ceramic or induction hob, apply a suitable hob cleaner and follow its directions. If the manufacturer permits a hob scraper, use the correct scraper at the recommended angle to lift stubborn deposits gently.
Never use a kitchen knife, metal spatula or improvised sharp tool.
For gas hobs with enamel or stainless steel surfaces, soften the residue with a damp cloth and washing-up liquid before gently working on it with a suitable sponge.
Avoid assuming that every dark mark is removable dirt. Some marks may be permanent discolouration, scratches or damage to the finish.
If you are unsure whether a mark can be safely removed, test the cleaning method on an inconspicuous area first or consult the manufacturer’s guidance.
Step 5: Clean Around Burners, Controls and Edges
The narrow spaces around burners, knobs and hob edges often collect crumbs, grease and cooking splashes.
Use a soft brush or a lightly dampened cloth to loosen debris from accessible areas. A soft toothbrush can help reach small crevices without the harsh abrasion of a scouring pad.
Never spray cleaner directly into controls, burner openings, ignition components or electrical connections. Apply a small amount to your cloth instead, keeping moisture under control.
For removable knobs, follow the appliance instructions before taking them off. Some controls should not be removed or soaked.
If grease has accumulated around the edges where the hob meets the worktop, wipe it away carefully without forcing water or cleaning products into the joint.
Step 6: Rinse Away Residue and Dry Thoroughly
Once the dirt has been removed, wipe the surface with a clean cloth dampened with plain water, provided this is suitable for the appliance.
This step removes leftover detergent and cleaning-product residue that could otherwise leave streaks or attract further dirt.
Use a separate dry microfibre cloth to dry the surface. For glass and ceramic hobs, gentle buffing can improve the finish and help reveal any remaining smears.
Make sure removable components are completely dry before reinstalling them. Reassemble the hob according to the manufacturer’s instructions, and do not use it until everything is correctly positioned and dry.
Step 7: Check the Finished Hob
Inspect the surface under good lighting. Look for greasy patches, cleaning streaks and residue around the edges.
If necessary, repeat the gentle cleaning process on individual areas rather than scrubbing the entire hob again.
Check that burner caps and pan supports are correctly positioned on gas hobs. If anything appears damaged, loose or obstructed, consult the manufacturer’s instructions before using the appliance.
Explore KeepShine’s free cleaning resources for practical ways to organise household chores and make your cleaning routine easier to manage.
Pro Tip

For a better finish, clean the hob in small sections rather than applying lots of cleaner across the entire surface at once. This helps you control moisture, concentrate on stubborn areas and remove residue before it dries. On glass or ceramic hobs, finish with a clean, dry microfibre cloth and inspect the surface from different angles to spot any remaining streaks.
How to Keep Your Hob Cleaner for Longer
A deep clean is much easier when grease and food deposits are prevented from building up in the first place. A few simple habits can significantly reduce the effort needed during your next thorough clean.
Wipe Away Spills Once the Hob Is Safe
After cooking, allow the hob to cool sufficiently before wiping away splashes and loose food. Follow the appliance instructions if they specify when and how the surface can be cleaned.
Fresh spills are generally easier to remove than food that has been repeatedly heated and hardened onto the surface.
However, never wipe a hot glass or ceramic hob with a cold, wet cloth. Sudden temperature changes can damage certain surfaces, and contact with a hot cooking zone can cause burns.
Clean Grease Before It Accumulates
Grease can spread beyond the immediate cooking area, collecting around controls, edges and adjacent worktops.
Wipe away oily splashes with a suitable cloth and washing-up liquid after the surface has cooled. Clean the surrounding worktop as well, so grease is not transferred back onto the hob.
If you are improving your wider kitchen routine, our guide to cleaning a kitchen properly can help you organise the different surfaces and tasks more efficiently.
Follow a Practical Cleaning Schedule
Your hob does not need the same level of attention every day. Adjust your routine according to how often you cook and how much residue accumulates.
Frequency | Cleaning task |
|---|---|
After cooking, when safe | Wipe away fresh splashes and loose food |
Several times a week, as needed | Remove grease and clean around frequently used zones |
Weekly, or when necessary | Clean removable parts and inspect edges and controls |
Monthly, or when build-up warrants it | Carry out a more thorough clean of accessible components and stubborn deposits |
These are suggested intervals, not fixed requirements. A household that cooks frequently may need to clean more often, while occasional cooking may require less maintenance.
For more tailored guidance, read how often you should clean your hob.
Prevent Marks and Scratches
Use cookware with clean, dry bases and lift pots rather than dragging them across glass surfaces. Remove loose particles before moving pans, as trapped debris can scratch some finishes.
Choose cleaning products specifically suited to your hob and avoid using one abrasive cloth for every kitchen surface.
For other appliances, the same principle applies: appropriate products and gentle methods matter. For example, our guide to cleaning an oven properly explains how to approach another grease-prone part of the kitchen.
Mistakes to Avoid
– Cleaning while the hob is hot. This creates a burn risk and may cause problems when cool liquids meet hot surfaces. Switch off the appliance and allow it to cool according to the manufacturer’s guidance before cleaning.
– Using abrasive pads or unsuitable chemicals. Steel wool, harsh powders and unapproved cleaners can scratch glass, damage enamel or affect protective finishes. Choose a product compatible with the hob material.
– Flooding the surface with water. Excess liquid can enter burner openings, controls, seams or electrical components. Use a damp cloth rather than pouring water directly onto the hob.
– Scraping burnt food with a knife. Improvised sharp tools can leave permanent scratches. If scraping is permitted, use a purpose-designed hob scraper and follow the manufacturer’s instructions.
– Reassembling wet burner components. Moisture around gas burner parts can interfere with ignition or operation. Dry removable components thoroughly and refit them correctly before using the hob.
– Mixing cleaning chemicals. Combining products, particularly bleach with acidic cleaners, can release hazardous fumes. Use one suitable product at a time and follow its label instructions.
If built-up kitchen grease is becoming difficult to manage, KeepShine can help you explore professional cleaning support for a cleaner, more comfortable cooking space.
More Questions About Deep Cleaning a Hob
Here are answers to some additional questions that can help you choose the right cleaning method and avoid damaging your appliance.
Can I use vinegar to deep clean a hob?
Vinegar is acidic, so it is not automatically suitable for every hob surface or component. Some manufacturers advise against acidic products on particular finishes. Check your appliance’s care instructions before using vinegar, and never mix it with bleach or other cleaning chemicals. A hob-specific cleaner is the safer choice when compatibility is uncertain.
How do I remove burnt-on grease without scratching the hob?
Start by softening the residue with a suitable cleaner or a warm, damp cloth, provided this is safe for your hob. Allow the product to work for the time stated on its label, then use a soft sponge. For glass-ceramic surfaces, a purpose-designed scraper may be suitable if the manufacturer permits it. Avoid forceful scrubbing.
Can I use baking soda on a glass hob?
Do not assume baking soda is suitable simply because it is a common household cleaning ingredient. Its abrasive properties may mark certain delicate finishes when rubbed against them. Check the manufacturer’s guidance and use an approved hob cleaner if you are unsure. Always test any permitted cleaning method on a small, inconspicuous area first.
Why does my hob still look streaky after cleaning?
Streaks can result from leftover detergent, cleaner residue, grease or minerals in water. Wipe the surface with a clean cloth dampened with plain water if appropriate, then dry and buff it with a clean microfibre cloth. Using too much cleaning product can make streaking worse, so apply it sparingly.
How often should I deep clean my hob?
The ideal frequency depends on your cooking habits and how quickly grease accumulates. Wipe away spills after cooking once the surface is safe to clean, and carry out a more thorough clean when deposits begin to build up. A weekly inspection and periodic cleaning of removable parts can help prevent stubborn residue from developing.
Is it safe to use an oven cleaner on a hob?
Not necessarily. Oven cleaners may contain strong ingredients that are unsuitable for glass, enamel, stainless steel or other hob materials. Never use one unless the product label and your hob manufacturer’s instructions explicitly confirm compatibility. Choose a cleaner designed for the particular appliance surface instead.
Subscribe to KeepShine for more practical kitchen cleaning advice, helpful household routines and straightforward ways to keep your home cleaner.
Final Thoughts: Make Deep Cleaning Part of Your Kitchen Routine
A clean hob starts with choosing the right method for the surface you have. Gentle cleaning, careful attention to removable components and thorough drying can help remove grease and food deposits without causing avoidable damage.
You do not need to scrub aggressively or rely on a collection of harsh products to achieve good results. Regular wiping and occasional deeper cleaning are usually more manageable than allowing residue to accumulate over many cooking sessions.
Next time you finish cooking, check the hob once it is safe to clean and deal with any fresh splashes before they harden. That small habit can save time later and make your next deep clean considerably easier.