
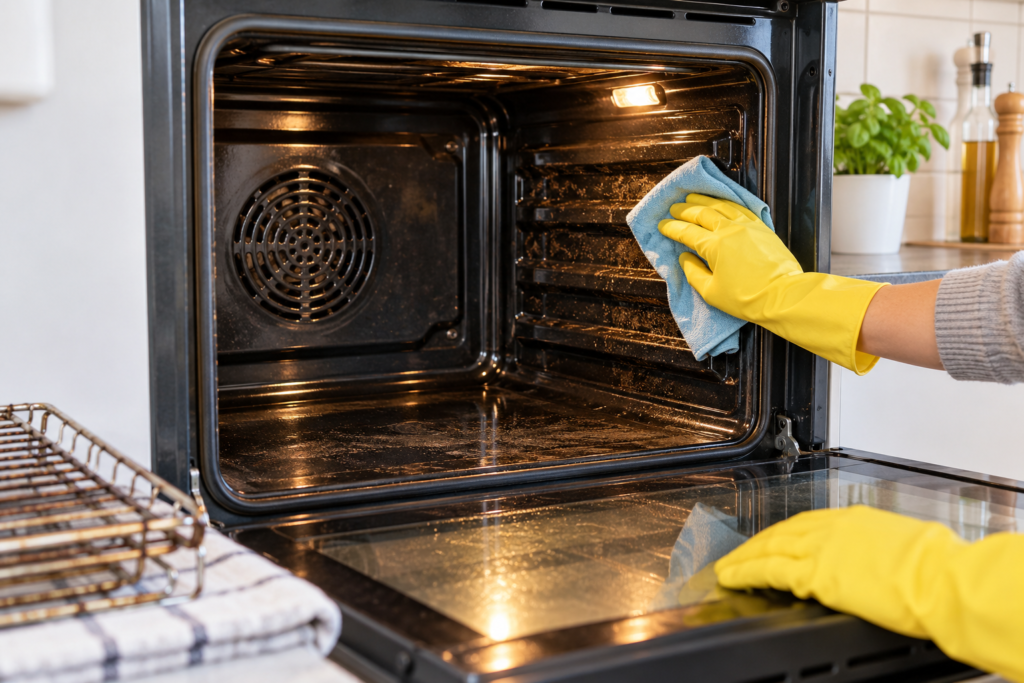
Cleaning an oven properly removes burnt-on food, grease and cooking residue without damaging the appliance. The safest method is patient cleaning rather than aggressive scrubbing or overly harsh products.
Ovens gradually collect splashes, crumbs and grease during normal cooking. Once these residues are repeatedly heated, they can become harder to remove and may produce unpleasant smells or smoke.
A thorough clean does not necessarily require specialist equipment. With the right preparation, suitable products and a sensible step-by-step method, you can clean the racks, interior, door and surrounding areas safely and effectively. Always check your oven manufacturer’s instructions before using a cleaning product or removing components.
What to Know Before You Start Cleaning Your Oven
Before cleaning, make sure the oven is completely switched off and cold. Remove loose crumbs first, then deal with grease and baked-on residue rather than immediately applying cleaner to everything.
You will usually need:
- Rubber cleaning gloves
- Microfibre cloths or soft cleaning cloths
- A non-scratch sponge
- Warm water
- Washing-up liquid
- A suitable oven-cleaning product, if required
- An old toothbrush or small soft brush for awkward areas
- Towels or newspaper to protect the floor
Avoid abrasive scourers on surfaces that could scratch, particularly glass and coated or enamelled areas.
If your appliance has catalytic liners, pyrolytic cleaning or another self-cleaning system, check its manual before proceeding. The correct cleaning method can be very different from that used for a conventional oven.
How to Clean an Oven Step by Step
1. Switch Off the Oven and Let It Cool Completely
Never start cleaning a hot oven. Switch it off and wait until the appliance and racks are completely cool.
If you have recently cooked, allowing adequate cooling time also makes handling removable components much safer.
For a wider cleaning session, you can combine the job with our guide to cleaning your kitchen properly.
2. Remove the Oven Racks and Other Removable Parts
Take out the shelves, racks and removable trays that the manufacturer allows you to remove.
This gives you much better access to the oven cavity and means you can clean each component separately rather than trying to work around it.
Place the racks somewhere suitable for cleaning. A large sink may work, or you can use another protected area where dirty water and grease will not damage surrounding surfaces.
3. Remove Loose Crumbs and Food Debris
Before introducing water or cleaning products, remove as much loose debris as possible.
Wipe or carefully brush crumbs, burnt food fragments and other loose material from the base of the oven. Removing dry debris first prevents it turning into a messy paste once moisture is added.
Pay attention to the corners and around the edges, where crumbs often collect.
4. Clean the Oven Racks
Soak racks in warm water with washing-up liquid where appropriate. Allowing grease and food residue time to soften can considerably reduce the amount of scrubbing required.
Use a non-scratch sponge or suitable brush to work along the bars and into corners. Stubborn deposits may need another period of soaking rather than increasingly aggressive scrubbing.
Rinse thoroughly and leave the racks to dry.
If ordinary cleaning is no longer enough for heavy accumulated residue, our oven deep-cleaning guide covers the more intensive job separately.
5. Clean the Inside of the Oven
Apply a cleaning method suitable for your particular oven. A solution of warm water and washing-up liquid may be sufficient for lighter grease, while heavier baked-on deposits may require a dedicated oven cleaner that is approved for the surfaces you are treating.
Follow the cleaner’s instructions carefully, including its recommended contact time and any ventilation or protective-equipment requirements.
Work methodically around the oven rather than scrubbing randomly. Clean the base, sides and back where appropriate, paying particular attention to visible grease and food splashes.
Do not apply cleaning products directly to heating elements, fans, vents, electrical components or other areas the manufacturer tells you to avoid.
6. Work on Baked-On Deposits Carefully
When residue has been heated repeatedly, it may not disappear with one wipe.
Give an appropriate cleaning product time to work according to its instructions, then loosen the deposit gently with a non-scratch sponge or tool suitable for the oven surface.
Avoid attacking stubborn marks with metal implements or highly abrasive pads. Removing a stain is not worthwhile if the process permanently scratches or damages the oven.
For recurring problems, knowing the common oven-cleaning mistakes to avoid can prevent damage and unnecessary work.
7. Clean the Oven Door and Glass
The inside of the door can collect a surprising amount of grease and cooking residue.
Wipe the door using a cleaner suitable for its materials. On the glass, use a non-abrasive cloth or sponge and concentrate on greasy patches and splashes.
Some oven doors have several glass panels. Do not dismantle the door unless the manufacturer’s instructions specifically explain how to do so safely.
Be careful around seals. They are important to the oven’s operation and should not be aggressively scrubbed, pulled or saturated with cleaner.
8. Remove Cleaning Residue
Once the dirt has been removed, wipe the cleaned surfaces thoroughly with fresh damp cloths as appropriate.
This stage matters because you do not want unnecessary cleaning-product residue remaining inside the cooking area.
Rinse or change your cloth regularly rather than moving greasy water from one part of the oven to another.
9. Dry and Reassemble the Oven
Use a clean cloth to remove excess moisture and allow the oven and its removable components to dry properly.
Return the racks and trays to their correct positions once everything is clean and dry.
Finally, wipe the exterior controls and handle using a method suitable for their materials. Avoid excessive water around control panels and electrical areas.
Explore KeepShine’s free downloadable cleaning resources if you would like practical help organising your kitchen and wider household cleaning.
Pro Tip

After cooking something likely to spit or overflow, deal with fresh splashes once the oven has completely cooled rather than waiting for them to be baked on repeatedly. A quick wipe at the right time can prevent a small amount of residue becoming a much harder cleaning job later.
Dealing With Stubborn Grease and Burnt-On Food
Some oven dirt is difficult because it has gone through repeated heating and cooling cycles. A mark that would have wiped away easily when fresh can eventually become a hard, dark deposit.
The answer is not necessarily more scrubbing. Often, giving a suitable cleaner enough contact time to soften the residue is more effective and less likely to damage the surface.
Work on stubborn areas individually. Apply your chosen product according to its instructions, wait for the specified period and then test the area gently with a non-scratch sponge. Repeat if necessary rather than immediately reaching for a sharp scraper.
Be particularly careful if you are unsure what material you are cleaning. Oven interiors can include enamel, coated surfaces, glass, seals and specialist self-cleaning liners, and they should not automatically be treated in the same way.
Once the oven is clean, prevention becomes much easier than another major clean. Our guide to keeping your oven clean for longer explains the simple habits that can reduce future build-up.
It is also worth establishing a sensible routine instead of waiting until the oven looks heavily soiled. How frequently it needs attention depends on how often you cook and what you prepare. See our practical oven-cleaning schedule for more guidance.
Mistakes to Avoid
- Cleaning while the oven is still hot. Apart from the risk of burns, cleaning products may not be intended for use on hot surfaces. Allow the appliance to cool completely first.
- Using abrasive tools without checking the surface. Wire wool, metal scrapers and harsh scourers can scratch glass, enamel or coated surfaces. Use non-scratch equipment unless the manufacturer specifically permits something else.
- Spraying cleaner everywhere. Heating elements, fans, seals, vents and electrical components may require different treatment. Never assume an oven cleaner is suitable for every part of the appliance.
- Ignoring the product instructions. Strong cleaning products may have specific requirements concerning gloves, ventilation, contact time, rinsing and compatible surfaces. Follow the label rather than improvising.
- Leaving cleaner behind. After loosening the dirt, thoroughly remove cleaning residue as directed. Simply wiping away the visible grease is not necessarily the end of the job.
- Waiting until every clean becomes a major task. Small spills are usually easier to deal with once the oven has cooled. Regular maintenance can prevent layers of burnt-on residue accumulating.
If tackling a heavily soiled oven feels like more work than you want to take on, KeepShine can help with professional home cleaning.
Your Oven Cleaning Questions Answered
Oven cleaning can raise a few questions beyond the basic method, particularly when dealing with different appliances and stubborn residue.
How often should I clean my oven?
There is no single schedule that suits every household. An oven used daily for roasting and baking may become dirty much faster than one used occasionally.
Check it regularly for grease, burnt food and spills, and clean problems before they become heavily baked on. For a fuller routine, follow our guide to how often an oven should be cleaned.
Can I use the self-cleaning function instead?
Only if your oven has one and you follow its manufacturer’s instructions.
Pyrolytic and other self-cleaning systems are designed differently from ordinary manual cleaning. You may need to remove particular accessories or take other steps before starting the cycle, so consult the appliance manual rather than assuming the procedure.
How do I stop my oven from smelling after cleaning?
Make sure food debris, dirty water and cleaning-product residue have been properly removed. Wipe and rinse surfaces as directed by the product instructions and allow the oven to dry.
If a strong or unusual smell persists, particularly after using a chemical cleaner, check the cleaner and appliance instructions before using the oven for cooking.
Should I clean the hob at the same time?
You do not have to, but cleaning both can be convenient because grease and cooking splashes often affect the whole cooking area.
The correct method depends on whether you have gas, ceramic, induction or another hob type. Follow our step-by-step guide to cleaning a hob properly rather than using your oven-cleaning method automatically.
Can I remove the oven door to clean between the glass?
Some models are designed to allow this, but others require a specific procedure.
Check your oven manual before removing the door or separating glass panels. Oven doors can be heavy, and incorrect dismantling may damage hinges, seals or glass. If the manufacturer does not provide a user-cleaning procedure, do not force the components apart.
Subscribe to KeepShine for more practical kitchen-cleaning guides, household tips and useful cleaning resources.
Final Thoughts: Make Future Oven Cleaning Easier
A clean oven is much easier to maintain when grease and spills are dealt with before they develop into thick, burnt-on deposits.
Start with loose debris, give stubborn dirt time to soften and use tools and products that are appropriate for your particular appliance. Most importantly, avoid assuming that every oven surface can be cleaned in the same way.
Once the oven is back in good condition, a little regular maintenance can save considerable effort later. Deal with obvious spills after the appliance has cooled, check the interior regularly and include it in your wider kitchen-cleaning routine rather than waiting until a deep clean becomes unavoidable.