
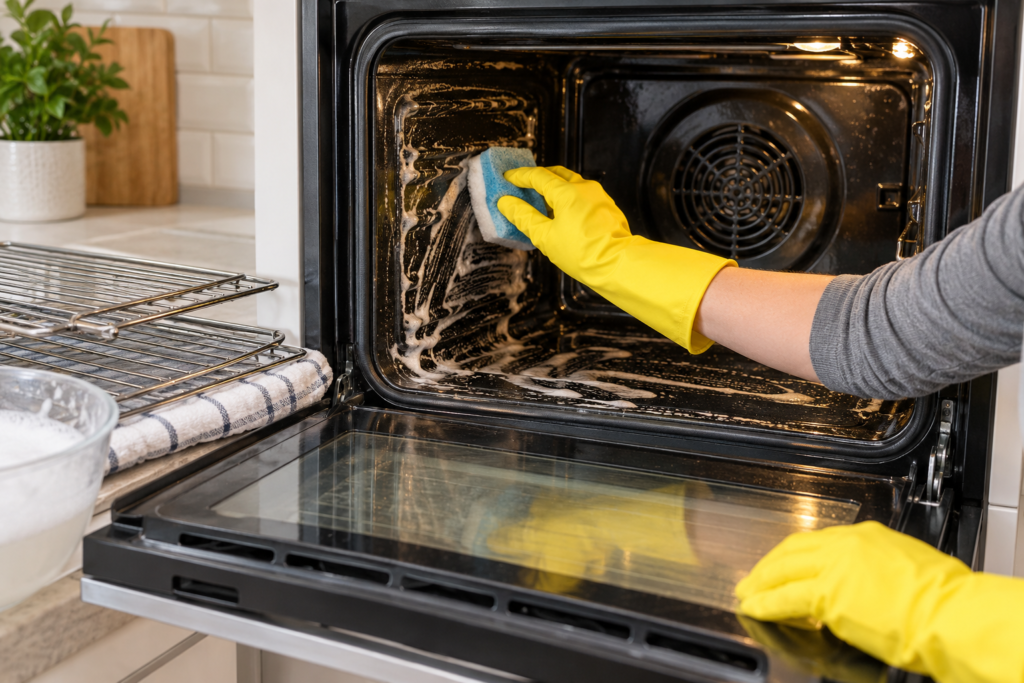
Deep cleaning an oven removes the burnt-on grease, food residue and stubborn grime that ordinary wiping can leave behind. A thorough oven clean takes more effort than routine cleaning, but working systematically makes the job much more manageable.
The key is to give suitable oven cleaner or your chosen cleaning method enough time to loosen baked-on residue rather than relying on aggressive scrubbing. This guide takes you through the whole process, from preparing the oven and cleaning removable parts to tackling the interior, door and finishing touches safely.
What to Know Before You Deep Clean Your Oven
Before starting, check your oven manufacturer’s care instructions. Oven interiors, catalytic liners, self-cleaning panels, door glass and other components can have different cleaning requirements, and a method that is suitable for one oven may damage another.
Allow plenty of time for a deep clean. Much of the work becomes easier when stubborn deposits have time to soften.
You will typically need:
- Rubber cleaning gloves
- Microfibre cloths or soft cleaning cloths
- Non-scratch sponges
- A soft brush or old toothbrush
- Washing-up liquid
- A suitable oven cleaner, if appropriate for your appliance
- A washing-up bowl or sink for removable parts
- Old towels or protective covering for the floor
Make sure the oven is completely switched off and cool before you begin. Keep the room well ventilated when using cleaning products and always follow the product’s safety instructions.
How to Deep Clean an Oven Step by Step
A deep clean is easiest when you work from the removable components to the oven interior and finish with the door and exterior. If your oven only needs routine attention rather than a full deep clean, our guide to cleaning an oven properly covers the regular cleaning process.
1. Prepare the Oven and Surrounding Area
Switch the oven off and make sure every surface is completely cool.
Remove anything stored inside, then place an old towel, newspaper or another suitable protective covering underneath and immediately around the oven. Deep cleaning can loosen greasy residue, so protecting the surrounding floor makes the clean-up easier.
Open a window or provide good ventilation, particularly if you will be using a commercial oven-cleaning product.
Never mix different cleaning chemicals. More product does not necessarily produce better results and mixing products can create dangerous reactions.
2. Remove the Oven Racks and Other Removable Parts
Take out the shelves, racks and any other components that the manufacturer confirms are removable.
Removing these parts gives you better access to the oven cavity and allows you to clean them separately.
Soak suitable racks in warm water with washing-up liquid to begin loosening grease and cooked-on food. Your sink, a large washing-up bowl or another suitable container may work depending on their size.
Protect delicate sinks or baths from scratches before placing metal oven racks inside them.
3. Loosen Grease and Baked-On Residue Inside the Oven
Apply a cleaning product that is suitable for your particular oven, following its instructions carefully.
Pay particular attention to areas with heavy grease or carbonised food deposits, but avoid heating elements, fans, seals, vents, electrical components and special oven liners unless the manufacturer specifically says they can be cleaned using your chosen method.
Give the product the recommended contact time. This is one of the most important parts of deep cleaning because softened residue is much easier to remove.
Do not allow a cleaning product to remain on a surface longer than its instructions permit.
4. Clean the Oven Racks Thoroughly
Return to the soaking racks once the residue has softened.
Use a non-scratch sponge or suitable brush to work along the bars, corners and joints where grease tends to collect. For particularly stubborn areas, allow additional soaking time rather than immediately reaching for an abrasive scourer.
Rinse the racks thoroughly with clean water and dry them before putting them back into the oven.
5. Work Through the Oven Interior
Start removing the loosened residue with a damp cloth or non-scratch sponge.
Work methodically across the interior rather than scrubbing randomly. This helps you see which sections have already been cleaned and reduces the chance of leaving patches of grime behind.
Frequently rinse or replace your cloth as it becomes dirty. Otherwise, you may simply spread greasy residue around the oven.
For corners, joins and other awkward areas, a small soft brush can provide more control. Avoid forcing tools into openings, vents or around electrical components.
If the surrounding cooking area also needs attention, a proper kitchen clean can help you tackle grease beyond the oven itself.
6. Deal With Stubborn Burnt-On Deposits
Some patches may remain after the first pass.
Instead of using excessive force, repeat the appropriate cleaning treatment on the affected area and allow more time for the residue to soften. A non-scratch pad may help where permitted by the manufacturer’s instructions.
Avoid metal scrapers, knives and harsh abrasive tools unless they are specifically approved for the surface you are cleaning. Oven coatings and glass can be scratched or damaged surprisingly easily.
7. Clean the Oven Door and Glass
Wipe the inside of the door using a product or method suitable for its material.
Grease often collects around the edges of the glass and door frame, so give these areas careful attention. Do not saturate door seals or allow excessive liquid to run between glass panels.
Some oven doors allow the glass panels to be removed for cleaning, but do this only when the manufacturer’s instructions explain how. Do not dismantle the door simply because dirt is visible between the panes.
8. Remove Cleaning Residue
Once the grease and grime have been removed, thoroughly wipe all appropriate surfaces with clean, damp cloths.
Several passes may be necessary. Keep rinsing the cloth and replacing the water until you are no longer picking up cleaner or greasy residue.
This finishing stage matters because you do not want unnecessary cleaning-product residue left inside the appliance.
9. Dry and Reassemble the Oven
Dry the accessible surfaces with a clean cloth and allow the oven to air dry fully.
Once the racks and other removable components are clean and dry, return them to their correct positions.
Wipe the oven controls, handle and exterior using a product suitable for their finish. Avoid spraying cleaner directly onto controls; apply it to the cloth instead where appropriate.
Your deep clean is now complete.
Browse KeepShine’s free downloadable cleaning resources for practical help making household cleaning and organisation easier.
Pro Tip

When burnt-on residue is difficult to shift, extra contact time is often more useful than extra force. Re-softening stubborn deposits with a surface-appropriate cleaner can make them easier to remove while reducing the temptation to use aggressive scrapers or scourers that could damage the oven.
How to Deal With Particularly Stubborn Oven Grease
A heavily used oven may have layers of grease that have repeatedly heated and hardened. One deep-cleaning pass may not remove everything.
If residue remains, identify whether you are dealing with greasy deposits or hard burnt-on food. Reapply an appropriate cleaner only to surfaces where its use is permitted and follow the specified contact time.
Avoid assuming that stronger chemicals are automatically the answer. The correct method depends on your oven’s materials and construction.
Special oven liners require particular care. Catalytic liners, for example, should not automatically be treated like ordinary enamel. Likewise, pyrolytic ovens have a dedicated high-temperature cleaning programme and should be operated according to their manufacturer’s instructions.
If your oven has a self-cleaning function, follow its manual rather than combining the programme with cleaning chemicals unless explicitly permitted.
The hob can also accumulate substantial cooking grease. Once the oven is finished, you may want to follow the appropriate method for cleaning your hob properly.
After a successful deep clean, regular maintenance will make the next one easier. Our guide explaining how often an oven should be cleaned can help you establish a practical routine.
Mistakes to Avoid
- Using highly abrasive tools: Steel wool, harsh scourers and unsuitable scrapers can scratch glass or damage oven coatings. Start with non-scratch tools and follow the appliance manufacturer’s guidance.
- Mixing cleaning products: Combining different chemicals can create hazardous fumes or reactions. Use one suitable product as directed and never experiment with chemical combinations.
- Cleaning heating or electrical components indiscriminately: Spraying cleaner throughout the entire oven can put liquid or chemicals where they should not be. Protect components and special surfaces according to your oven’s instructions.
- Scrubbing before giving the cleaner time to work: Trying to attack hardened grease immediately often creates unnecessary work. Appropriate soaking or contact time can soften deposits considerably.
- Forgetting to remove the final residue: Once the visible grime has gone, continue wiping with clean, damp cloths until cleaning-product and grease residue have been removed.
For more everyday pitfalls, see our guide to common oven-cleaning mistakes and how to avoid them.
If tackling a heavily soiled oven feels like more work than you want to take on, KeepShine can help with professional cleaning as part of your home cleaning needs.
Your Deep Oven Cleaning Questions Answered
Deep cleaning can raise a few practical questions, particularly when you are dealing with stubborn grease or deciding how often the job is necessary.
How often should I deep clean my oven?
There is no single schedule suitable for every household. How frequently your oven needs deep cleaning depends on how often you cook, what you cook and how quickly spills and grease accumulate. Regularly wiping fresh spills once the oven is safely cool can reduce the need for intensive cleaning.
Can I use baking soda to deep clean an oven?
Baking soda is commonly used for household cleaning, but you should still check whether it is suitable for your particular oven surfaces. Do not assume that a homemade method is automatically safe for every appliance, especially around specialist liners, heating elements and other sensitive components.
Can I clean between the glass panels in my oven door?
Only dismantle an oven door or remove its glass if the manufacturer’s instructions explain that this can be done safely by the user. If dirt is trapped between panes that are not designed for routine removal, avoid forcing tools or liquid into the gap.
Should I clean my oven while it is warm?
Unless a particular manufacturer-approved method specifically requires otherwise, allow the oven to cool before manual cleaning. Hot surfaces can cause burns and may affect how cleaning products behave. Follow the instructions for both your appliance and any product you use.
How can I stop my oven becoming heavily soiled again?
Deal with spills reasonably quickly once the oven has cooled, wipe accessible surfaces regularly and avoid allowing repeated layers of grease to bake onto the interior. Our guide to keeping your oven clean for longer covers practical maintenance between deeper cleans.
Does deep cleaning the oven replace normal kitchen cleaning?
No. The oven is only one area where cooking grease and food residue accumulate. Worktops, splashbacks, the hob and surrounding surfaces still need their own routine. Treating oven deep cleaning as part of wider kitchen maintenance makes the overall job easier to manage.
Subscribe to KeepShine for more practical cleaning guides, household tips and useful resources to help make jobs such as oven cleaning easier to manage.
Final Thoughts: Make the Next Oven Deep Clean Easier
The easiest oven to deep clean is one that has not been allowed to build up months of burnt-on spills and grease.
Once your oven is clean, get into the habit of checking it after cooking and dealing with new spills when the appliance has cooled and it is safe to do so. Small amounts of fresh residue are generally much easier to tackle than repeated layers that have been heated again and again.
Combine this with an appropriate regular cleaning routine rather than waiting until the oven looks heavily soiled. A little maintenance between deep cleans can save considerable effort and help keep your cooking space looking cared for.