
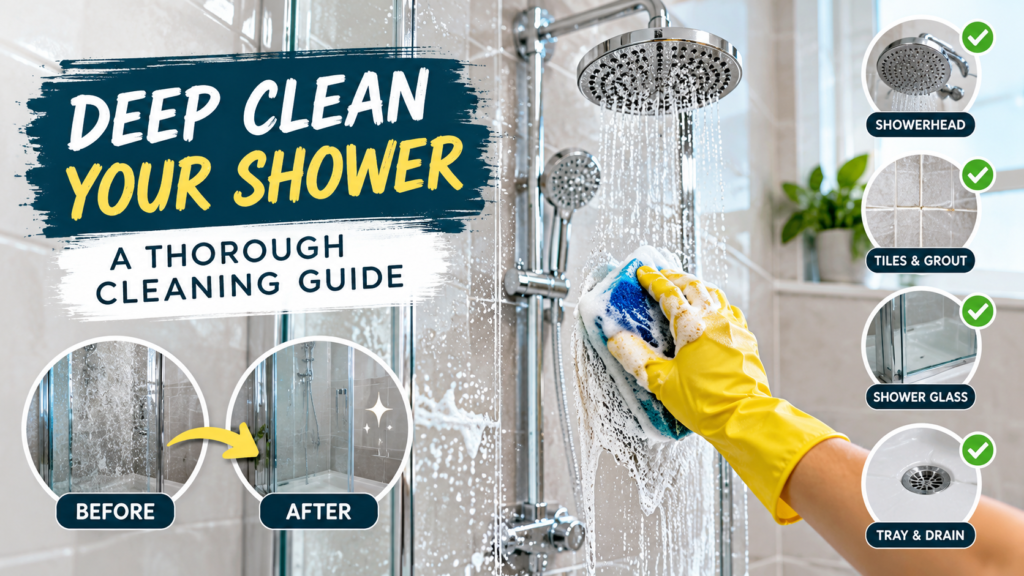
Deep cleaning a shower removes soap scum, limescale, grime and hidden dirt that regular cleaning can leave behind. With the right products and techniques, you can restore your shower’s appearance and make it easier to maintain.
A shower may look reasonably clean at first glance, yet glass doors can develop cloudy marks, grout lines can darken and corners can collect stubborn residue. These problems often need more than a quick rinse or wipe.
This guide explains how to deep clean a shower step by step, including how to tackle glass, tiles, grout, showerheads and other difficult areas without damaging the surfaces.
What Does a Proper Shower Deep Clean Involve?
A thorough shower clean should address every part of the shower, not just the visible surfaces. This includes the showerhead, taps, glass screens, tiles, grout, seals, tray, drain and areas behind fittings where accessible.
Before starting, gather:
Microfibre cloths and non-scratch sponges
A soft-bristled cleaning brush and an old soft toothbrush
A squeegee
A bucket and clean water
A suitable bathroom cleaner
A limescale remover compatible with your shower surfaces
A grout cleaner, if needed
Protective gloves
A plastic bag and elastic band, if your showerhead requires soaking and its manufacturer permits it
Allow approximately 45–90 minutes for a typical shower, depending on its size and condition. Heavy limescale, extensive mould or neglected grout may require additional time.
Important safety advice: Never mix cleaning products, particularly bleach with acidic limescale removers or vinegar. These combinations can release dangerous gases. Ventilate the bathroom, follow product labels and check the manufacturer’s care instructions before using chemicals on glass coatings, natural stone, metal finishes or seals.
How to Deep Clean a Shower Step by Step
Follow these steps in order to work efficiently and avoid spreading dirt back onto surfaces you have already cleaned.
Step 1: Clear the Shower and Prepare the Area
Remove shampoo bottles, soap, razors, bath toys, shelves that can be safely removed and other loose items. Empty the shower tray so that every corner is accessible.
Check the condition of the shower before applying any products. Look for thick limescale, orange or brown staining, mould, damaged grout and peeling silicone seals.
Open a window or switch on the bathroom extractor fan. Put on suitable gloves and read the instructions for each cleaning product you intend to use.
If your bathroom contains natural stone, such as marble or limestone, avoid ordinary acidic limescale removers and vinegar. These can etch or dull the surface. Use a stone-safe cleaner instead.
Step 2: Rinse Away Loose Dirt
Rinse the walls, shower tray and other water-safe surfaces with warm water, provided the manufacturer’s instructions permit it.
This loosens loose hair, body oils, soap residue and surface grime. Remove hair and debris from the tray and drain opening by hand while wearing gloves.
Avoid pouring boiling water onto glass, plastic fittings or a cold shower tray, as sudden temperature changes can cause damage.
Step 3: Clean the Showerhead and Taps
Mineral deposits can gradually block showerhead nozzles and leave taps covered in white, chalky marks.
Apply a suitable limescale remover according to its label. For a removable showerhead, you may be able to soak it in a compatible cleaning solution. If using a plastic bag to hold the solution around a fixed showerhead, ensure the manufacturer permits this and that the fitting can tolerate the product.
Do not assume vinegar is suitable for every finish. Acidic solutions can damage certain plated, coated or decorative fittings.
Use a soft brush to clean around nozzles and tap bases. Rinse thoroughly and dry with a clean cloth.
Never force blocked nozzles with sharp metal objects, as this may damage them. Follow the manufacturer’s descaling instructions where available.
Step 4: Deep Clean Shower Tiles and Walls
Apply a bathroom cleaner suitable for your tiles and wall panels. Work in manageable sections so the product does not dry before you rinse it away.
Use a non-scratch sponge or soft brush to loosen soap scum and body oils, paying attention to corners, edges and the areas around fittings.
For stubborn residue, allow the cleaner to remain on the surface for the contact time stated on its label. Longer is not automatically better; excessive exposure may damage some finishes.
Rinse each section thoroughly before moving on.
If you have natural stone tiles, use a pH-neutral stone-safe cleaner and avoid abrasive pads. For additional advice on maintaining the rest of the room, see our guide to cleaning a bathroom properly.
Step 5: Scrub the Grout and Corners
Grout lines often hold more dirt than the surrounding tiles because their textured surfaces collect soap residue and grime.
Apply a grout cleaner suitable for your grout type and follow its instructions. Gently scrub the lines with a soft-bristled brush, using an old toothbrush for narrow corners and areas around fittings.
Avoid aggressive scrubbing that could erode grout or loosen damaged sections. If the grout is crumbling, cracked or missing, cleaning alone will not solve the underlying problem.
Rinse thoroughly and inspect the lines again once they are wet and clean. Persistent dark patches may indicate staining or mould rather than ordinary dirt.
Step 6: Remove Soap Scum and Limescale from Shower Glass
Shower glass can become cloudy when soap residue and mineral deposits accumulate.
Choose a glass-safe bathroom cleaner or a compatible limescale remover. Spray it onto the glass as directed, allowing the recommended contact time without letting it dry.
Wipe with a non-abrasive sponge or microfibre cloth, then rinse thoroughly. Use a squeegee to remove excess water and finish with a clean, dry cloth.
Pay particular attention to the lower edges, door tracks and corners where residue collects.
Avoid scouring pads, abrasive powders and harsh tools, especially on glass with protective coatings. If white marks remain despite cleaning, they may be etched into the glass rather than removable surface deposits. Our guide to cleaning shower glass properly covers this area in more detail.
Step 7: Clean the Shower Tray and Drain
Apply a suitable cleaner to the shower tray and scrub gently, paying attention to the edges, corners and the area around the drain.
Use a non-scratch sponge on acrylic trays and other delicate finishes. Avoid abrasive products unless the manufacturer specifically approves them.
Remove the drain cover if it is designed to come off easily and the manufacturer’s instructions allow it. Clear accessible hair and debris without forcing tools into the pipework.
Wash away loosened residue and rinse the tray thoroughly. If the drain remains slow, a separate drain-cleaning method may be needed.
For a toilet or bathroom floor that also needs attention, follow the relevant cleaning instructions rather than using one product indiscriminately across every surface.
Step 8: Clean Seals, Tracks and Hard-to-Reach Areas
Use a soft toothbrush and a suitable cleaner to reach the edges of shower doors, sliding tracks, silicone seals and the bases of fittings.
These areas can collect soap residue, moisture and dirt that are easily missed during routine cleaning.
Rinse carefully, removing cleaner from narrow gaps where possible, and dry accessible surfaces with a clean cloth.
If silicone seals are cracked, lifting or persistently mouldy, do not simply cover the problem with stronger chemicals. Damaged seals may need repair or replacement to prevent water from reaching areas behind the shower.
Step 9: Rinse, Dry and Inspect
Give the shower a final rinse wherever the surface and fittings permit it. Make sure cleaning residue has been removed, particularly from the tray and places where bare skin may come into contact with the surface.
Dry the glass, taps and accessible metal fittings with a microfibre cloth. Wipe away remaining water from ledges and corners.
Return clean toiletries to the shower only after the surfaces are tidy and the area has had an opportunity to dry.
Finish by checking for missed patches, blocked drainage and signs of damaged grout or seals. A final inspection helps distinguish areas that need further cleaning from those that need maintenance.
Explore KeepShine’s free cleaning resources for practical ways to organise household cleaning and keep everyday tasks manageable.
Pro Tip

When tackling heavy soap scum, work on one small section at a time rather than spraying the entire shower at once. This keeps the cleaner within its recommended contact time and prevents it drying onto the surface. A controlled approach also makes it easier to see which areas genuinely need more attention and which simply need a thorough rinse.
How to Deal with Stubborn Shower Stains and Keep Surfaces Cleaner
Not every mark in a shower has the same cause. Choosing a treatment based on the type of deposit helps you achieve better results without damaging the finish.
White, Chalky Deposits
White crusty marks around taps, showerheads and glass are often caused by limescale from hard water. Use a compatible limescale remover and follow its instructions.
If you live in a hard-water area, these deposits may return quickly. Regular drying and prompt removal of new marks can reduce their build-up.
Greasy or Cloudy Residue
Soap scum commonly develops when soap ingredients combine with minerals in water, while body oils and product residue contribute to the build-up.
A suitable bathroom or soap-scum cleaner is generally a better starting point than an aggressive abrasive. Rinse the surface well to prevent a new film forming as the cleaner dries.
Dark Grout and Mould-Like Marks
Dark patches may be caused by ordinary dirt, mould growth or staining within the grout. Use a cleaner approved for the affected surface and ventilate the bathroom during cleaning.
Persistent mould around silicone may be embedded in the material, while widespread mould or recurring growth can indicate a moisture problem. Cleaning the visible surface will not correct a leak or inadequate ventilation.
If the grout is deteriorating or the seal is damaged, consider professional assessment rather than repeatedly applying stronger chemicals.
Make Deep Cleaning Less Frequent
The easiest way to keep a shower clean is to prevent deposits from accumulating.
Use a squeegee on shower glass after use.
Wipe taps and other water-sensitive fittings dry.
Leave the shower ventilated until moisture has reduced.
Remove hair from the drain regularly.
Clean soap residue before it hardens.
Check grout and silicone periodically for deterioration.
For a more consistent routine, use our guide to how often to clean your shower. Small maintenance tasks can reduce the amount of scrubbing required during your next deep clean.
Mistakes to Avoid
– Mixing cleaning chemicals. Combining bleach with vinegar, acidic limescale removers or other incompatible products can release dangerous gases. Use one product at a time and rinse thoroughly before switching products.
– Using abrasive pads on glass or delicate finishes. Scouring pads and gritty powders can scratch glass coatings, acrylic trays and polished fittings. Choose non-scratch tools and surface-compatible cleaners.
– Leaving products on for too long. A longer soaking time does not guarantee better cleaning and may damage grout, metal finishes or seals. Follow the product label and rinse as directed.
– Using acidic cleaners on natural stone. Vinegar and many limescale removers can etch marble, limestone and other acid-sensitive materials. Choose a suitable stone-safe cleaner.
– Scrubbing damaged grout or silicone aggressively. Forceful brushing can worsen existing damage without removing embedded staining. Clean gently and arrange repairs when seals or grout are deteriorating.
– Ignoring ventilation and residue. Poor ventilation slows drying, while leftover cleaning products can leave marks or irritate skin. Ventilate the bathroom and rinse surfaces thoroughly.
If stubborn deposits or a heavily neglected shower are taking more time than you can spare, KeepShine can help with professional cleaning for a fresher, more manageable bathroom.
More Questions About Deep Cleaning a Shower
Here are answers to common questions about shower cleaning, including how long it takes, what to use and when a mark may need more than another round of scrubbing.
How often should you deep clean a shower?
For a regularly used household shower, a thorough clean every one to four weeks is a reasonable starting point. The ideal frequency depends on how many people use it, the hardness of your water, ventilation and how quickly soap scum accumulates. Wiping surfaces after use can reduce the need for frequent intensive cleaning.
Can you deep clean a shower with vinegar?
Vinegar can help loosen some mineral deposits on compatible surfaces, but it is not suitable for every shower. It can damage natural stone, including marble and limestone, and may affect certain metal finishes, coatings and seals. Check the manufacturer’s instructions first and never mix vinegar with bleach or other cleaning chemicals.
How do you remove stubborn limescale from shower glass?
Start with a limescale remover labelled as suitable for your particular glass and any protective coating. Follow the recommended contact time, wipe gently and rinse thoroughly. Avoid abrasive tools. If the cloudy marks remain, the glass may be etched or its coating may be damaged, in which case ordinary cleaning may not restore its original appearance.
How do you clean black mould from shower silicone?
Use a suitable product labelled for the affected surface and follow its safety instructions. Ventilate the room and never mix mould cleaners with other products. If black staining remains embedded in the silicone, or the seal is cracked or lifting, cleaning may not be sufficient. Replacement may be necessary, particularly if water can penetrate behind the seal.
Why does my shower get dirty again so quickly?
Hard water, soap residue, body oils, frequent use and poor ventilation can all contribute to rapid build-up. If you notice white marks returning, water deposits may be responsible. If surfaces remain damp for long periods, improve ventilation where possible. A quick rinse, squeegee and wipe after use can help prevent deposits becoming established.
How long does a professional shower deep clean take?
A typical shower may take around 45–90 minutes to clean thoroughly, although the time varies with its size, condition, materials and the amount of limescale or soap scum present. A heavily neglected shower may take longer. Cleaning also cannot repair etched glass, damaged grout, failed silicone or underlying leaks.
Subscribe to KeepShine for practical bathroom cleaning advice, helpful household routines and future guides to keeping your home cleaner.
Final Thoughts: Enjoy a Cleaner Shower with Less Effort
A successful shower deep clean depends on three things: choosing the right cleaner for each surface, working methodically and giving stubborn deposits enough attention without using unnecessarily harsh methods.
Start with the areas that collect the most residue, then work through the glass, tiles, grout, fittings and tray. Finish by rinsing away cleaning products and drying the surfaces wherever practical.
Once the shower is clean, a few minutes of maintenance after use can make a noticeable difference. Regularly removing water, clearing hair and keeping the room ventilated helps prevent grime from building up again.
Most importantly, recognise when a problem is no longer just dirt. Damaged seals, deteriorating grout and permanently etched glass need a different solution from routine cleaning.