
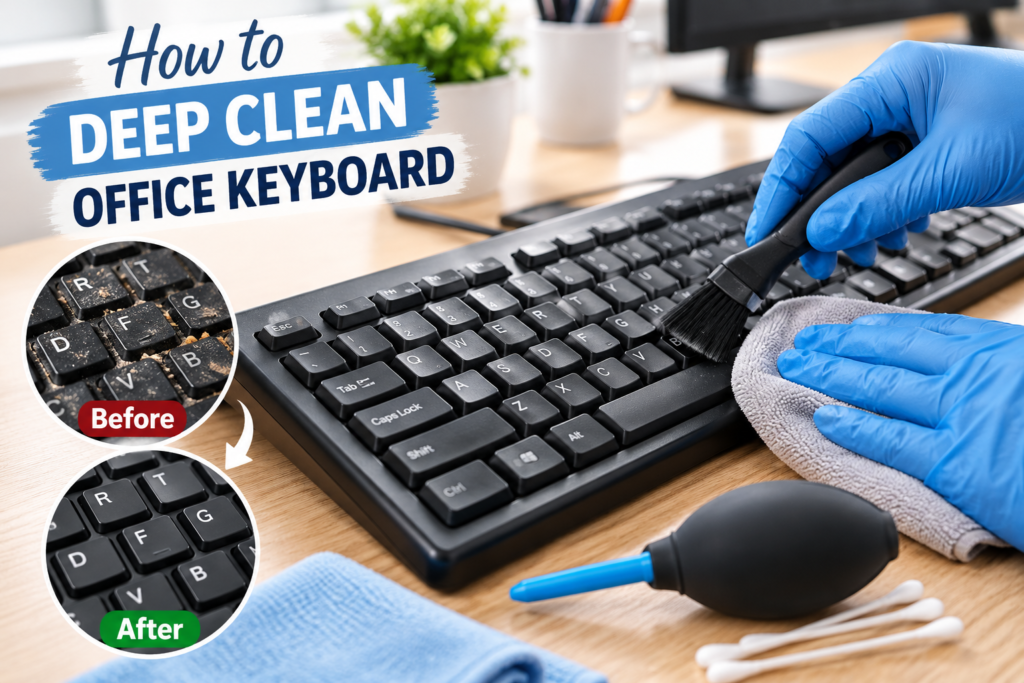
Office keyboards collect dust, crumbs, skin oils and everyday grime between their keys. Learning how to deep clean an office keyboard safely helps remove built-up dirt, keeps shared workspaces more hygienic and helps your equipment stay in good condition.
A quick wipe may be enough for routine maintenance, but a proper deep clean needs a little more attention. The important thing is to remove loose debris first, clean the surfaces carefully and avoid introducing moisture into the keyboard’s electronic components.
Whether you use a keyboard at home or in a busy workplace, this guide explains the equipment you need, how to clean each area thoroughly, which mistakes to avoid and how to keep your keyboard cleaner for longer.
What Is the Safest Way to Deep Clean an Office Keyboard?
The safest approach is to disconnect the keyboard, remove loose debris, clean the keys and outer surfaces with a suitable lightly dampened cloth, and allow everything to dry completely before reconnecting it.
You do not normally need to remove individual keys to achieve a thorough clean. In fact, taking them off unnecessarily can damage key mechanisms, particularly on laptop keyboards and models with delicate switches.
Before starting, gather:
A soft, lint-free microfibre cloth.
A soft brush suitable for electronics.
A manual air blower or compressed air, if appropriate for the manufacturer’s instructions.
Cotton buds for accessible narrow gaps.
A cleaning product approved for the keyboard’s materials, if needed.
A dry cloth for final wiping.
Allow around 15–30 minutes for an ordinary deep clean, plus drying time. Heavily soiled keyboards may take longer.
Always disconnect a wired keyboard before cleaning. Switch off a wireless keyboard and remove its batteries if the manufacturer recommends doing so. Never spray liquid directly onto the keyboard, and avoid soaking keycaps or internal components.
How to Deep Clean an Office Keyboard Step by Step
Follow these steps to remove dirt from the keys, the spaces between them and the keyboard’s outer casing without putting the electronics at unnecessary risk.
Step 1: Disconnect the Keyboard and Prepare Your Workspace
Save your work, shut down the computer if appropriate and disconnect the keyboard. For a USB keyboard, unplug the cable from the computer. For a wireless model, switch it off and remove the batteries if advised by the manufacturer.
Move the keyboard to a clear, dry surface. If you are cleaning a shared office workstation, let colleagues know that the equipment is temporarily unavailable.
Take a photograph of the keyboard before cleaning if you think you might need to remove any keycaps later. This will help you remember their original positions.
Check the manufacturer’s cleaning instructions, especially if the keyboard has mechanical switches, special coatings, built-in lighting or a non-standard layout.
Step 2: Remove Loose Dust, Crumbs and Debris
Turn the disconnected keyboard upside down and gently tilt it over a bin. Tap the back lightly with your hand to encourage loose crumbs and dust to fall out. Do not shake it aggressively or strike it against a hard surface.
Next, use a soft brush to loosen debris around the edges of the keys. Work gently and avoid forcing dirt further into the keyboard.
A manual air blower can help dislodge particles from narrow gaps. If you use compressed air, follow the keyboard manufacturer’s guidance and the product’s instructions. Keep the can upright where directed, use short controlled bursts and avoid excessive pressure.
Do not use a household vacuum with a powerful suction setting directly over delicate keys or components. Static electricity and strong suction can create unnecessary risks.
Removing loose debris first is important because wiping a dirty keyboard immediately can push particles into the gaps or spread grime across the key surfaces.
Step 3: Clean the Keycaps and Visible Surfaces
Once the loose debris has been removed, clean the tops and sides of the keys.
Lightly dampen a microfibre cloth with a cleaning solution approved for your keyboard. The cloth should be damp, not wet. Never spray the solution directly onto the keys.
Wipe each key gently, paying particular attention to frequently used areas such as the space bar, Enter key, Shift keys and the letters used throughout the working day.
These areas often accumulate fingerprints and skin oils. If the keyboard is shared, pay attention to the keys that many different people touch.
Use a clean section of the cloth as it becomes dirty. This prevents accumulated grime from being transferred back onto the keyboard.
If the keys have stubborn marks, repeat the gentle wiping process rather than scrubbing aggressively. Printed letters and protective coatings can be damaged by unsuitable chemicals or excessive friction.
For a complete routine covering lighter maintenance between deep cleans, see our guide to cleaning an office keyboard properly.
Step 4: Clean Between the Keys
The spaces between keys are among the easiest areas to overlook. Dust, hair and small food particles can collect here even when the keyboard looks reasonably clean.
Use a soft brush to loosen visible debris around the sides of the keys. Work across the keyboard in small sections so that you can see which areas have already been cleaned.
For narrow gaps, a dry cotton bud can help collect accessible dust. Do not push it deeply between the keys, and avoid leaving fibres behind.
If you use compressed air, direct debris away from the keyboard rather than blowing it further inside. Follow the manufacturer’s instructions, particularly if the keyboard has mechanical switches.
Do not pour liquid between the keys or insert sharp objects into the gaps. If dirt is trapped beneath a key that cannot be cleaned safely from the surface, consult the manufacturer’s guidance before attempting to remove the keycap.
Step 5: Wipe the Edges, Base and Cable
The top surface is not the only part that collects grime. The sides, corners, underside and cable can also accumulate dust and fingerprints.
Wipe the outer casing with a lightly dampened cloth and dry it afterwards with a clean, soft cloth. Avoid getting moisture into cable connections, switches, seams or openings.
For a wired keyboard, wipe the cable gently from one end to the other, taking care not to pull, twist or bend it sharply. Keep the connector dry.
If the keyboard has rubber feet, inspect them for accumulated dust. Clean around them gently without pulling them off.
Once you have finished, check that no visible residue remains on the casing or around the keys.
Step 6: Allow the Keyboard to Dry Completely
Before reconnecting the keyboard, inspect it carefully for moisture.
Allow it to air-dry in a well-ventilated area. Do not use a hairdryer, heater or other direct heat source to speed up the process.
The keyboard must be completely dry before you switch it on or reconnect it. Follow any additional drying instructions supplied by the manufacturer.
When it is ready, reconnect the keyboard, switch it on and test the keys. Check that the main keys, number pad and function keys respond normally.
If a key sticks, fails to respond or behaves unusually after cleaning, disconnect the keyboard again and consult the manufacturer’s troubleshooting guidance.
Explore KeepShine’s free downloadable cleaning resources for practical ways to organise your cleaning tasks and maintain a tidier workspace.
Pro Tip

When cleaning a busy office keyboard, use two microfibre cloths: one for removing grime and another for the final wipe. This makes it easier to avoid spreading loosened dirt back over the keys. If several keyboards need attention, clean them one at a time and keep used cloths separate from clean ones.
How Often Should You Deep Clean an Office Keyboard?
The right cleaning schedule depends on how many people use the keyboard, the conditions around the workstation and the manufacturer’s care recommendations.
For a keyboard used by one person in a relatively clean office, a sensible starting point is to wipe the visible surfaces regularly and deep clean as needed, perhaps every few weeks.
Shared keyboards deserve more frequent attention because multiple people handle the same keys throughout the day. Daily surface cleaning may be appropriate in busy shared workspaces, with more thorough cleaning when visible dirt accumulates or workplace hygiene procedures require it.
Consider the following factors when setting a routine:
Frequency of use: keyboards used throughout the day generally need more regular attention than those used occasionally.
Shared equipment: reception desks, training rooms and hot-desking areas may require more frequent cleaning.
Food and drink: crumbs and spills increase the need for cleaning. Keeping meals away from keyboards reduces the problem.
Workplace requirements: follow any relevant cleaning procedures, particularly in environments with specific hygiene controls.
For a more detailed schedule, use our guide to how often to clean an office keyboard.
Remember that visible cleanliness and disinfection are not the same thing. If a shared workplace requires disinfection, choose a product compatible with the equipment and follow the product instructions. Never assume that a general-purpose household cleaner is safe for electronic devices.
Mistakes to Avoid
– Spraying cleaner directly onto the keyboard. Liquid can seep beneath the keys and reach sensitive electronic components. Apply an approved solution to a cloth instead, keeping it only slightly damp.
– Using too much water or cleaning solution. A wet cloth can leave moisture in narrow gaps. Wring out the cloth properly and use a dry cloth afterwards where appropriate.
– Choosing harsh chemicals. Bleach, abrasive cleaners and unsuitable solvents may damage key markings, plastics or protective coatings. Check the manufacturer’s instructions before using any cleaning product.
– Removing keycaps without checking first. Some keycaps are removable, but others have delicate mechanisms that can break easily. Do not assume that every keyboard can be dismantled safely.
– Reconnecting the keyboard before it is dry. Moisture can cause electrical problems. Allow complete drying and follow the manufacturer’s guidance before restoring power.
– Ignoring the rest of the workstation. A freshly cleaned keyboard can quickly collect dust and grime again if the surrounding desk remains dirty. Follow our guide to cleaning an office desk properly so the surrounding surface receives the same attention.
If your office needs a more thorough refresh beyond everyday equipment maintenance, KeepShine can help with professional cleaning for the wider workspace.
More Questions About Deep Cleaning Office Keyboards
Here are answers to a few additional questions about cleaning office keyboards safely and dealing with common problems.
Can I use disinfectant wipes on an office keyboard?
Only use wipes that are approved for your particular keyboard and follow the manufacturer’s instructions. Some disinfectant wipes contain chemicals that may damage plastics, printed characters or surface coatings. Never allow liquid to pool around the keys, and do not reconnect the keyboard until it is completely dry.
Is it safe to remove the keys before deep cleaning?
It depends on the keyboard. Some mechanical keyboards have removable keycaps, but laptop keyboards and many low-profile models have delicate clips and mechanisms. Check the manufacturer’s instructions before removing anything. If removal is permitted, use the recommended method and keep the keycaps organised so they can be returned to their correct positions.
What should I do if a drink spills onto my keyboard?
Disconnect the keyboard immediately if you can do so safely, and switch it off. Remove batteries if appropriate and follow the manufacturer’s spill guidance. Do not reconnect it to test whether it works while moisture may remain inside. Liquid spills can leave sticky residues or cause internal damage, so professional assessment or replacement may be necessary.
Can I use the same cloth to clean my keyboard and computer screen?
It is better to use separate, clean cloths for different surfaces. Keyboards collect oils and debris that you do not want to transfer to a display. Computer screens may also have delicate coatings that require different cleaning methods. For safe screen care, follow our guide to cleaning a computer screen properly.
How can I stop my office keyboard getting dirty so quickly?
Wash and dry your hands before using the keyboard, avoid eating over it and remove loose dust regularly. If equipment is shared, establish a consistent cleaning routine and make suitable cleaning supplies available. Keeping the workstation tidy also helps; our guide to cleaning an office properly covers the wider environment.
Subscribe to KeepShine for more practical cleaning guides, including simple ways to keep office equipment and everyday workspaces cleaner.
Final Thoughts: Keep Your Office Keyboard Cleaner for Longer
A thorough clean does not have to involve dismantling your keyboard or using a collection of specialist products. Most routine deep cleans can be completed with careful debris removal, a suitable cloth and a little patience.
The key is consistency. Remove loose dust before wiping, use only compatible cleaning products, keep moisture away from electronic components and allow the keyboard to dry completely before reconnecting it.
Small habits also make a difference. Avoid eating over your keyboard, clean visible marks before they build up and include shared equipment in your regular workplace cleaning routine.
If your keyboard has removable keycaps, unusual coatings or persistent problems, check the manufacturer’s instructions rather than risking damage through guesswork. A careful approach will help keep your keyboard presentable, comfortable to use and ready for the working day.