
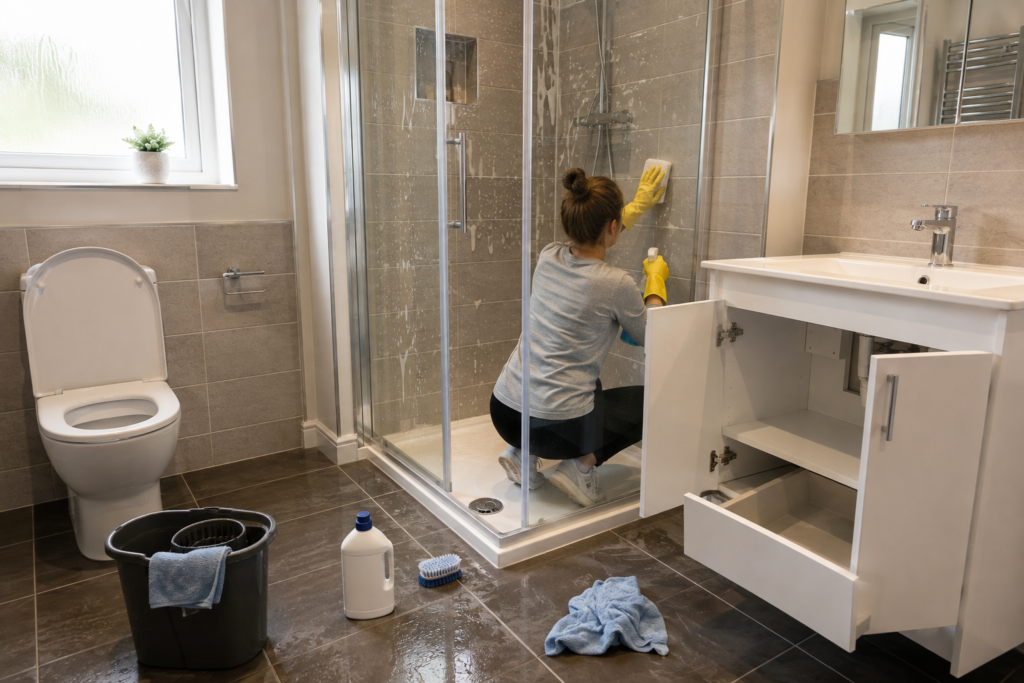
Deep cleaning a bathroom means tackling the dirt, limescale, soap residue and hidden grime that ordinary weekly cleaning can miss. A thorough bathroom deep clean leaves the whole room fresher and makes regular cleaning easier afterwards.
Bathrooms need extra attention because moisture, toiletries, soap and everyday use can quickly create build-up around taps, tiles, shower screens, toilets and less obvious areas. The good news is that you do not need complicated equipment or dozens of specialist products to clean one properly.
This guide explains how to deep clean a bathroom from top to bottom, including the best order to work in, areas that are commonly overlooked and practical ways to get better results without repeatedly cleaning the same surfaces.
What You Need Before Deep Cleaning Your Bathroom
Before starting, gather your cleaning supplies so you are not constantly leaving the room halfway through the job. The exact products you need will depend on your bathroom surfaces and fittings, but a basic kit might include:
- Microfibre cloths
- Non-scratch sponges
- Bathroom cleaner
- Toilet cleaner
- Glass or shower-screen cleaner
- A suitable limescale remover
- An old toothbrush or small cleaning brush
- Mop and bucket
- Vacuum cleaner
- Rubber gloves
- Bin bags
Always check product labels and the manufacturer’s care instructions before using chemicals on natural stone, specialist finishes, painted surfaces or delicate fittings.
Never mix cleaning chemicals. In particular, products containing bleach should not be mixed with acidic cleaners or other cleaning products.
If your bathroom mainly needs routine attention rather than a full deep clean, our guide to cleaning a bathroom properly step by step covers a more regular cleaning routine.
How to Deep Clean a Bathroom Step by Step
Working in a sensible order makes deep cleaning much easier. Start high, deal with dry dust before introducing water, and leave the floor until near the end.
1. Clear the Bathroom First
Remove toiletries, towels, bath mats, toothbrush holders, bins and other movable items. Empty the shower and bath edges rather than trying to clean around bottles.
Throw away empty containers and anything you no longer use. Put washable bath mats and towels aside for laundering according to their care labels.
Empty the bin and remove any obvious rubbish.
A clear room gives you access to corners and surfaces that are normally hidden and makes it much easier to see where dirt has accumulated.
2. Remove Dust, Hair and Loose Dirt
Before spraying cleaners, remove dry debris.
Dust shelves, light fittings where safely accessible, extractor covers and the tops of cabinets. Pay attention to corners, skirting boards and behind the toilet.
Vacuum or sweep the floor to collect hair and dust. This prevents loose debris from turning into wet, difficult-to-remove mess once you begin using cleaning products.
Avoid cleaning electrical fittings with wet cloths unless the manufacturer’s instructions specifically permit it.
3. Clean the Shower and Bath Thoroughly
Remove soap residue and body-product build-up from the bath, shower tray, wall tiles and surrounding surfaces using a product suitable for the material.
Give the cleaner the contact time stated on its label rather than spraying and immediately wiping it away. Then wipe or gently scrub the surface and rinse where required.
Look carefully at corners, joints, shower tracks and areas around taps where residue tends to collect.
If your shower screen has cloudy mineral deposits, use an appropriate product for the glass and fittings. Hard-water marks may need more than one treatment rather than aggressive scrubbing.
4. Deal With Taps and Limescale
Taps, shower heads and other fittings can gradually develop limescale, particularly in hard-water areas.
Use a limescale treatment that is safe for the particular finish. Chrome, brass, black fittings and other specialist finishes can have different care requirements, so do not assume one product is suitable for everything.
Pay attention to the base of taps and small joins where deposits collect. A small brush can help reach tight areas without excessive scrubbing.
Rinse away product residue where required and buff suitable fittings with a clean, dry microfibre cloth.
5. Clean Tiles, Grout and Seals
Wipe wall tiles thoroughly, paying particular attention to areas around the bath and shower.
Grout can trap discolouration and residue that is less noticeable during everyday cleaning. Use a suitable grout-cleaning method and a small brush if necessary, but avoid excessively hard scrubbing that could damage the grout.
Inspect silicone seals while cleaning. Dark marks caused by surface dirt may clean away, but damaged, deteriorating or deeply mould-affected sealant may eventually need replacing rather than endlessly scrubbing it.
6. Deep Clean the Toilet
Start with the bowl so the toilet cleaner has time to work according to its label instructions.
Clean beneath the rim with a toilet brush, then work around the rest of the toilet using a separate cloth or disposable cleaning material. Clean the flush control, cistern, lid, seat, hinges, outside of the bowl and base.
Our detailed guide explains how to clean a toilet properly when you want to tackle the whole fixture thoroughly.
Keep toilet-cleaning cloths separate from cloths used elsewhere in the bathroom to reduce the chance of transferring contamination to taps, handles and other frequently touched surfaces.
7. Clean the Sink, Vanity and Storage Areas
Remove everything from around the basin and wipe the entire sink, including the tap, plughole area and underside of accessible edges.
Clean the vanity unit or cabinet using a method appropriate for its material.
If you have emptied drawers or cupboards, vacuum or wipe away loose debris before replacing toiletries. Check bottles for sticky residue and wipe them before putting them back.
This is also a useful opportunity to discard empty packaging and organise products you actually use.
8. Clean Mirrors and Other Glass
Use a suitable glass cleaner and a clean microfibre cloth on mirrors and glass surfaces.
Rather than using excessive product, apply only enough to clean the surface. Too much cleaner can contribute to streaking and means more wiping.
Check the edges and lower sections of mirrors, which can collect splashes from handwashing and brushing teeth.
9. Wipe Frequently Touched and Forgotten Areas
A thorough clean should include the places that are easy to overlook.
Wipe door handles, cupboard handles, switches where safe to do so, towel rails, toilet-roll holders, shelves and other frequently touched surfaces.
Look behind bottles, around pipework, along skirting boards and behind the toilet where accessible.
These small areas often make the difference between an ordinary clean and a genuinely thorough bathroom clean.
10. Finish With the Floor
Vacuum or sweep again if your cleaning has knocked debris onto the floor.
Then mop using a product and method suitable for your flooring. Work towards the doorway so you do not have to walk back across the freshly cleaned floor.
Allow the floor to dry before replacing bath mats and other items.
For ongoing maintenance after your deep clean, a practical bathroom cleaning schedule can help you decide which jobs need regular attention and which can be done less frequently.
Explore KeepShine’s free downloadable cleaning resources for practical help organising your cleaning and keeping household jobs manageable.
Pro Tip
After cleaning, use a completely clean, dry microfibre cloth to buff suitable taps, mirrors and shower glass. Removing the final traces of moisture and cleaner can make these areas look noticeably better without applying more product, and keeping a separate finishing cloth prevents you from transferring residue from dirtier parts of the bathroom.
How to Keep Your Bathroom Cleaner After a Deep Clean
A deep clean is much more worthwhile when you can maintain the results without repeating the entire process every few days.
One of the simplest habits is dealing with moisture. Use your bathroom’s ventilation appropriately during and after showers or baths, and allow wet areas to dry rather than leaving water sitting on surfaces. Follow the manufacturer’s instructions for extractor fans and ventilation systems.
Wiping obvious water from shower glass and surrounding surfaces after use can also reduce the deposits that gradually become harder to remove.
Put toiletries back where they belong rather than allowing bottles to accumulate around the bath and basin. Fewer items on exposed surfaces mean fewer obstacles during regular cleaning and fewer hidden areas for residue to collect.
Deal with small messes when you notice them. Toothpaste around the basin, soap residue, splashes and hair are generally easier to remove before they build up.
A deep clean also does not need to replace ordinary bathroom maintenance. Smaller, regular jobs prevent the room from reaching the stage where everything needs intensive attention at once. Our guide to keeping your bathroom clean for longer explains practical habits that can reduce the amount of work required between bigger cleans.
The right frequency depends on how many people use the bathroom, how well ventilated it is and how quickly dirt and moisture accumulate. A busy family bathroom, for example, may need attention more frequently than a lightly used guest bathroom.
Mistakes to Avoid
- Mixing cleaning products. Combining household chemicals can create dangerous reactions. Use products individually according to their labels, rinse where instructed and never experiment with chemical mixtures.
- Using abrasive tools on delicate surfaces. A harsh scourer may remove dirt but can also scratch baths, shower trays, taps and other finishes. Start with the least aggressive suitable method and check care instructions when uncertain.
- Cleaning the floor too early. If you mop before cleaning higher surfaces, dust, hair and splashes can end up back on the floor. Work generally from top to bottom and leave the final floor clean until the end.
- Using the same cloth everywhere. A cloth used around the toilet should not then be used on the sink, taps or other frequently touched areas. Separate your cloths and wash reusable ones appropriately after cleaning.
- Ignoring product contact times. Immediately wiping away a product may prevent it from working as intended. Follow the label rather than assuming that longer or shorter is better.
- Letting small problems become heavy build-up. Regular maintenance is usually easier than repeatedly tackling thick soap residue and limescale. You can also avoid several common problems by recognising these bathroom cleaning mistakes before they become habits.
If your bathroom needs a more thorough clean than you have time to tackle yourself, KeepShine can help take care of the cleaning for you.
Common Questions About Deep Cleaning a Bathroom
Deep cleaning often raises questions about timing, products and how different areas should be handled, so here are answers to a few useful ones.
How long does it take to deep clean a bathroom?
There is no fixed time because bathroom size and condition vary considerably. A small, regularly maintained bathroom may be completed relatively quickly, while a room with substantial limescale, soap residue or many fittings can take much longer. Focus on cleaning each area properly rather than trying to finish within an arbitrary time limit.
How often should you deep clean a bathroom?
It depends on usage, ventilation and how well the bathroom is maintained between deep cleans. Regularly cleaning the toilet, basin, bath or shower and floor will reduce how frequently intensive cleaning is necessary. For a more detailed approach, see how often different parts of a bathroom should be cleaned.
Should I use bleach to deep clean the whole bathroom?
No single product is appropriate for every bathroom surface. Bleach-containing products may be suitable for certain jobs when their labels permit it, but they should not automatically be used everywhere. Always consider the material being cleaned, ventilation requirements and product instructions, and never mix bleach with other cleaners.
What is the best order for deep cleaning a bathroom?
Clear the room first, remove dry dust and hair, then clean higher and wetter areas such as the shower, bath, tiles and fittings. Clean the toilet with separate materials, followed by remaining surfaces and touchpoints, and finish with the floor. This reduces the amount of re-cleaning required.
What is the difference between regular cleaning and deep cleaning?
Regular cleaning focuses on keeping frequently used areas hygienic and presentable, such as the toilet, sink, shower or bath, mirrors and floor. Deep cleaning goes further by tackling accumulated residue and less frequently cleaned areas such as edges, grout, behind fixtures, cupboard interiors, skirting boards and other overlooked spots.
Should the bathroom or kitchen be deep cleaned first?
There is no universal rule. If you are deep cleaning several rooms, prioritise whichever needs attention most and complete one area before moving on. Kitchens have their own surfaces, appliances and food-related cleaning considerations, so use an appropriate method such as our step-by-step kitchen cleaning guide rather than treating both rooms in exactly the same way.
Subscribe to KeepShine for more practical cleaning guides, useful household tips and resources to help make everyday cleaning easier.
Final Thoughts: Make Your Next Bathroom Deep Clean Easier
A thorough bathroom clean becomes much more manageable when you follow a logical order instead of trying to tackle everything at once. Clear the room, remove dry dirt first, work methodically through the shower, bath, toilet, basin and other surfaces, and finish with the floor.
Once the bathroom is properly clean, simple maintenance can prevent grime and residue from building up as quickly. Regular attention to moisture, frequently used surfaces and small messes means your next deep clean should involve far less work.
Most importantly, use cleaning products appropriately, protect delicate surfaces and follow care instructions whenever you are unsure how a particular bathroom fitting or material should be cleaned.