
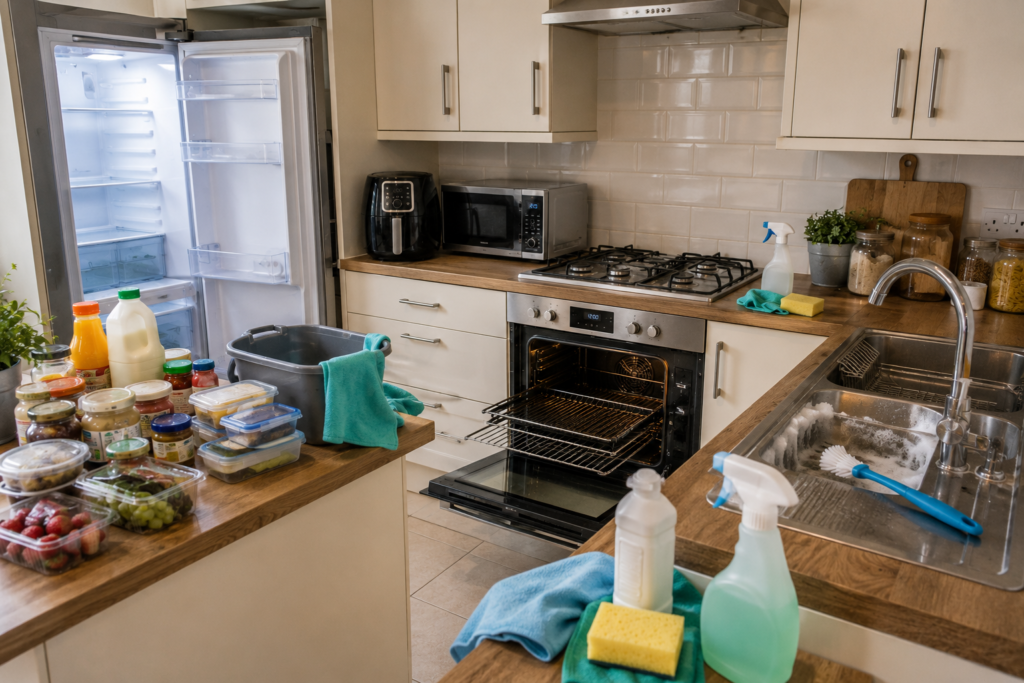
A deep cleaning kitchen routine goes beyond wiping worktops and washing the floor. It tackles built-up grease, hidden dirt and neglected areas throughout the room.
Kitchens need this deeper attention because everyday cooking, food preparation and washing-up gradually leave residue in places that normal cleaning does not always reach. Cupboard fronts become greasy, crumbs collect behind appliances, and areas around taps, handles and bins can become surprisingly dirty.
The good news is that you do not need to tackle everything at once or use dozens of specialist products. With a sensible order and the right equipment, you can thoroughly clean your kitchen without repeatedly cleaning the same surfaces.
This guide explains how to deep clean kitchen areas methodically, from cupboards and appliances to worktops, sinks and floors.
What to Do Before You Start Deep Cleaning Your Kitchen
Before reaching for your cleaning products, give yourself a clear working space. Remove washing-up, put food away, clear the draining board and take unnecessary items off the worktops.
Gather the basic supplies you are likely to need, such as:
- Microfibre cloths
- Sponges or non-scratch cleaning pads
- Washing-up liquid
- A suitable kitchen degreaser
- Disinfectant or antibacterial cleaner where appropriate
- Rubber gloves
- A small brush or old toothbrush for awkward areas
- Mop and bucket or your usual floor-cleaning equipment
- Vacuum cleaner or dustpan and brush
- Bin bags
Always check product labels and the manufacturer’s care instructions before using a cleaner on an unfamiliar surface. Natural stone, wood, stainless steel and some painted finishes can require particular care.
It also helps to work systematically. A good rule is declutter first, work from high to low, clean before disinfecting where necessary, and leave the floor until last.
How to Deep Clean a Kitchen Step by Step
A kitchen deep clean becomes much easier when you follow an order. Instead of moving randomly between jobs, work through the room from the upper surfaces down towards the floor.
1. Clear the kitchen and deal with clutter
Start by removing anything that does not belong in the kitchen. Put away clean dishes, clear paperwork and miscellaneous items, and move small appliances temporarily if you need access underneath them.
Empty the bin and recycling containers if they are full. Remove old food or obvious waste before you begin.
If your kitchen mainly needs routine cleaning rather than a complete deep clean, our step-by-step guide to cleaning a kitchen properly covers the regular process in more detail.
2. Dust and clean high areas first
Begin at the highest accessible points so that dust and debris falling downwards will be removed later.
Dust the tops of cupboards, accessible shelving, light fittings and other high surfaces. Pay attention to corners where cobwebs can collect.
Use safe access equipment rather than standing on worktops, chairs or unstable objects.
Wipe cupboard doors and handles using a product suitable for their finish. Areas close to the hob may need extra attention because airborne grease can create a sticky film that traps dust.
3. Deep clean inside cupboards and drawers
You do not necessarily need to empty every cupboard simultaneously. Work through them one at a time so the kitchen remains manageable.
Remove the contents, dispose of expired or unwanted food where appropriate, and vacuum or wipe away crumbs.
Clean the shelves, internal surfaces and drawer bases with a suitable cleaner, then allow them to dry before replacing the contents.
Take the opportunity to wipe jars and containers that have become sticky or dusty. Grouping similar items together can also make cupboards easier to maintain afterwards.
4. Clean the fridge thoroughly
Remove food in manageable sections and keep perishable items appropriately chilled while you work.
Take out removable shelves and drawers where the manufacturer’s instructions allow. Clean them according to the appliance’s care guidance and allow them to dry properly.
Wipe the interior walls, shelf supports, door compartments and seals carefully. Check for spills underneath containers and remove expired food as you replace everything.
Finally, clean the exterior, handles and accessible top of the appliance.
5. Tackle the oven and hob
The oven is often one of the longest jobs in a kitchen deep clean because baked-on grease and food residue may need time to soften.
Follow the oven manufacturer’s cleaning guidance, particularly if it has catalytic, pyrolytic or other specialist liners or cleaning functions. Avoid assuming that every oven can tolerate the same products.
For a more detailed method, follow our step-by-step guide to cleaning an oven properly.
Clean the hob using a method appropriate for its material. Glass, ceramic, induction and gas hobs can have different requirements. Never use abrasive tools unless the manufacturer confirms they are suitable.
6. Clean smaller appliances and the areas underneath
Microwaves, kettles, toasters, coffee machines and other countertop appliances can leave crumbs, splashes and residue behind them.
Switch off and unplug electrical appliances before cleaning them where appropriate. Follow their care instructions and never immerse electrical components in water.
Move lightweight appliances safely, wipe underneath them and clean the worktop before replacing them.
Pay particular attention to frequently touched controls and handles.
7. Degrease splashbacks and worktops
Remove remaining items from the worktops and clean the entire surface rather than simply wiping around appliances.
Grease commonly accumulates around cooking areas, splashbacks, wall edges and the back of worktops.
Use a cleaning product compatible with your surface and allow it the recommended contact time where the product instructions require this. Avoid mixing cleaning chemicals.
Rinse or wipe away residue when necessary and dry surfaces afterwards.
8. Deep clean the sink and taps
Remove food debris from the sink and clean the bowl, draining area, plug and surrounding edges.
Pay attention to the base of the taps and other narrow joins where grime and limescale can accumulate.
Use a product suitable for your sink and tap materials. Acidic products, abrasive powders and harsh pads can damage certain finishes, so check the manufacturer’s recommendations when unsure.
9. Clean the bin and recycling containers
Empty the containers completely and remove loose debris.
Wash or wipe the interior and exterior using an appropriate cleaner, paying particular attention to lids, handles and foot pedals. Allow containers to dry before inserting fresh liners.
Regularly cleaning the bin itself helps prevent unpleasant residue building up underneath the bag.
10. Finish with skirting boards and floors
By now, crumbs and dust from higher surfaces may have reached the floor.
Vacuum or sweep thoroughly, including along cupboard edges, beneath movable furniture and in corners.
Wipe skirting boards before washing the floor with a product appropriate for the flooring material.
Work towards the doorway so you do not need to walk over the freshly cleaned floor.
Browse KeepShine’s free downloadable cleaning resources for practical ways to make household cleaning and organisation easier.
Pro Tip

When deep cleaning, give products the contact or dwell time stated on their labels instead of spraying and immediately wiping them away. While one product is working, move to another suitable task. This can improve cleaning results while helping you use your time more efficiently.
The Areas That Are Easy to Miss During a Kitchen Deep Clean
A kitchen can look spotless while still hiding dirt in less obvious places. A thorough clean therefore includes areas that are rarely touched during everyday cleaning.
Look underneath and behind movable countertop appliances. Crumbs, grease and dust can collect around toasters, microwaves and kettles surprisingly quickly.
Check cupboard handles, drawer pulls, light switches and other frequently touched points. These areas may not look visibly dirty, but they are handled repeatedly during cooking.
Edges and joins deserve attention too. Look along splashback seams, around the base of taps, beneath the rim of the sink, around cupboard edges and where worktops meet walls.
Where safely accessible, check beneath or beside larger appliances. Do not attempt to move heavy or fitted appliances yourself if doing so could damage flooring, connections or the appliance. Gas appliances in particular should not be disconnected or moved inappropriately.
Extractor hood surfaces can also accumulate considerable grease. Clean accessible external areas and removable components only in accordance with the manufacturer’s instructions.
Once the kitchen is thoroughly cleaned, maintaining it becomes much easier. Our guide to keeping your kitchen clean for longer explains how small everyday habits can reduce the amount of grime that builds up between deeper cleans.
A sensible routine also prevents every kitchen job becoming urgent at the same time. If you are unsure what needs doing daily, weekly or less frequently, see our practical kitchen cleaning schedule.
Mistakes to Avoid

- Starting with the floor: Cleaning the floor first usually creates extra work because crumbs, dust and splashes can fall onto it while you clean higher surfaces. Leave sweeping, vacuuming and mopping until near the end.
- Using one cloth everywhere: Moving the same dirty cloth from the sink to worktops, cupboard fronts and appliances can simply redistribute grime. Change or rinse cloths appropriately as you move between different jobs.
- Mixing cleaning products: Combining household cleaning chemicals can create dangerous reactions. Use products exactly as directed and never mix cleaners unless their manufacturer explicitly states that it is safe.
- Using abrasive tools on delicate surfaces: Scrubbing harder does not always mean cleaning better. Abrasive pads can scratch stainless steel, glass, coated surfaces and some worktops. Choose tools and products appropriate for the material.
- Ignoring product contact times: Disinfectants and some cleaners may need to remain on a surface for a specified period to work as intended. Follow the label rather than immediately wiping every product away.
- Trying to deep clean everything too quickly: Rushing encourages missed areas and repeated work. One of the common kitchen cleaning mistakes worth avoiding is working without a sensible order.
If your kitchen needs a more intensive clean than you have the time or energy to tackle yourself, KeepShine can provide professional home cleaning support.
More Questions About Deep Cleaning Your Kitchen
Deep cleaning often raises practical questions about timing, frequency and what really needs to be included, so here are answers to a few common ones.
How often should you deep clean a kitchen?
There is no single schedule that suits every household. How often you need a deep clean depends on how frequently you cook, the number of people using the kitchen, pets, ventilation and how consistently routine cleaning is completed.
Rather than waiting for the entire room to become dirty, combine regular cleaning with occasional deeper jobs as they become necessary.
How long does a kitchen deep clean take?
The time required varies considerably according to kitchen size, condition and what you include. Cleaning inside cupboards, the fridge and oven will naturally take longer than concentrating on external surfaces.
For a heavily used kitchen, consider splitting the work into manageable sections rather than rushing through everything in one session.
What is the difference between regular kitchen cleaning and deep cleaning?
Regular cleaning generally deals with everyday mess: washing surfaces, cleaning the sink, dealing with spills, taking out rubbish and cleaning the floor.
Deep cleaning goes further by tackling accumulated grease, cupboard interiors, appliances, difficult edges and areas behind or underneath movable items that are not normally cleaned every day or week.
Should I disinfect everything in my kitchen?
Not necessarily. Cleaning and disinfecting serve different purposes, and not every kitchen surface needs constant disinfection.
Prioritise good routine cleaning and use disinfectants where appropriate, following the product instructions. Food-contact surfaces may require rinsing after certain products, so always check the label.
Should I clean the oven every time I deep clean the kitchen?
Not automatically. The oven should be cleaned according to its condition, usage and manufacturer’s recommendations.
If it was cleaned recently, your kitchen deep clean may only require wiping appropriate exterior surfaces. If grease and burnt food have accumulated inside, however, it is sensible to tackle it during the deeper clean.
Does an office kitchen need the same cleaning routine?
Many principles are similar, but shared workplace kitchens have different usage patterns and may require more frequent attention to communal touchpoints, appliances and food-preparation areas.
For a workplace setting, use our guide to cleaning an office kitchen properly rather than relying entirely on a domestic routine.
Subscribe to KeepShine for more practical kitchen cleaning guides, straightforward cleaning advice and useful resources to help make everyday cleaning easier.
Final Thoughts: Make Your Next Kitchen Deep Clean Easier
A successful kitchen deep clean is less about scrubbing everything as hard as possible and more about following a sensible system.
Clear the room first, work from higher surfaces downwards, tackle grease and hidden dirt methodically, and leave the floor until the end. Once the kitchen is clean, small maintenance jobs can prevent the next deep clean from becoming overwhelming.
You also do not have to complete every occasional task on the same day. A practical cleaning schedule allows you to rotate jobs such as cupboards, appliances and less accessible areas while keeping everyday surfaces under control.
The result is a kitchen that is easier to use, easier to maintain and much simpler to thoroughly clean the next time around.